Favorite Projects of 2012

As we get ready to head into 2013, I thought I would take today to highlight my favorite projects from 2012.

We’ve had a very busy year, especially once our house was finished and we could start moving in.

In no particular order, below is a recap of my very favorite projects from 2012.

We love our painted stripes. They totally transformed our entryway!
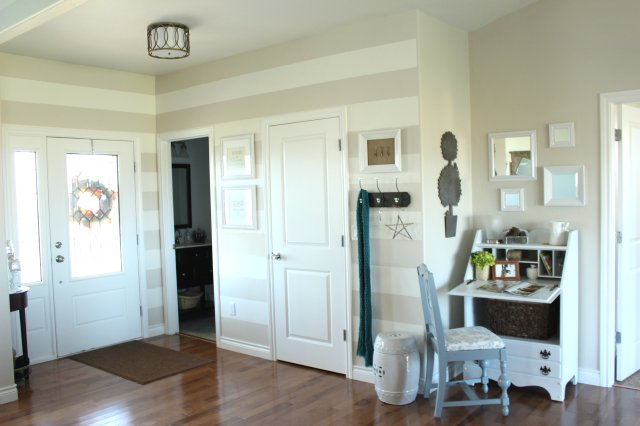
Entry Stripes

Our painted secretary– such a great transformation!
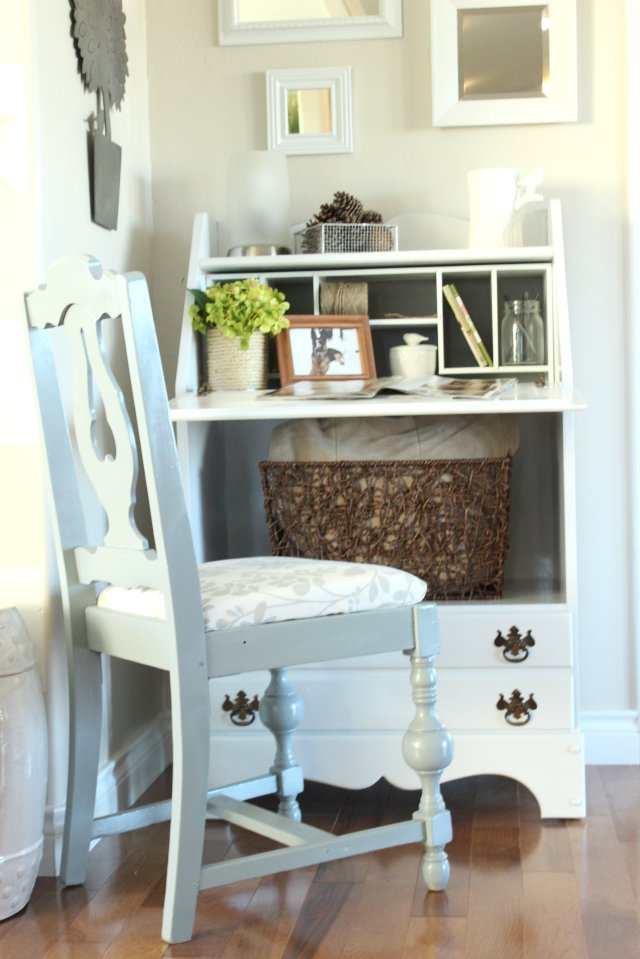
Painted Secretary

I also did my first big sewing project with our Breakfast Nook Curtains.  Although, they’re about to make an appearance in a different room.
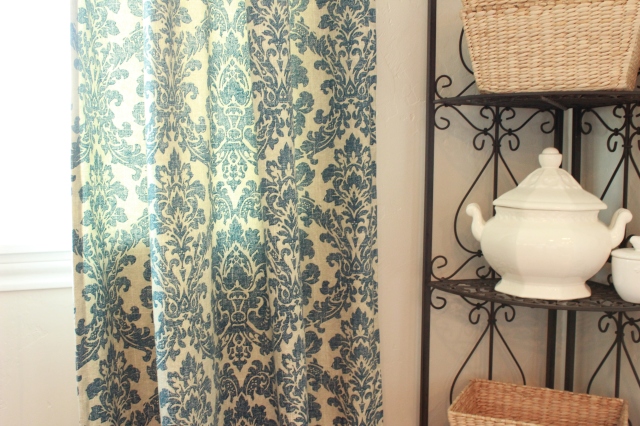
curtains 4

And I loved the outcome of my painted sewing machine table.

Paintec Sewing Machine Table

One of my favorite free projects was easily the burlap and stick welcome banner. It’s still hanging up! 🙂
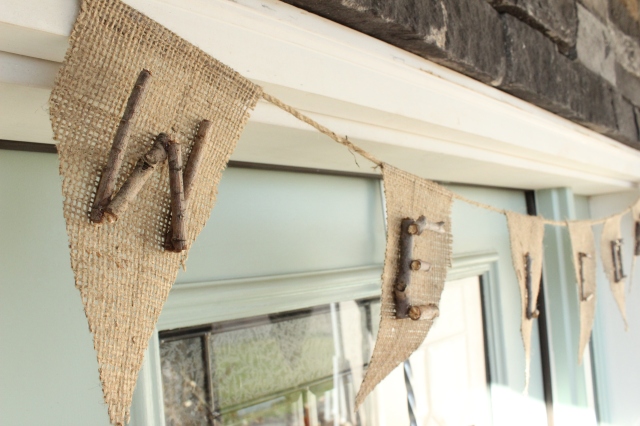
Burlap & Stick Welcome Banner

Possibly the most exciting “big” project we accomplished this year was the breakfast nook bench. It’s amazing how much it has changed the space and I absolutely can’t wait to finish the room in 2013!
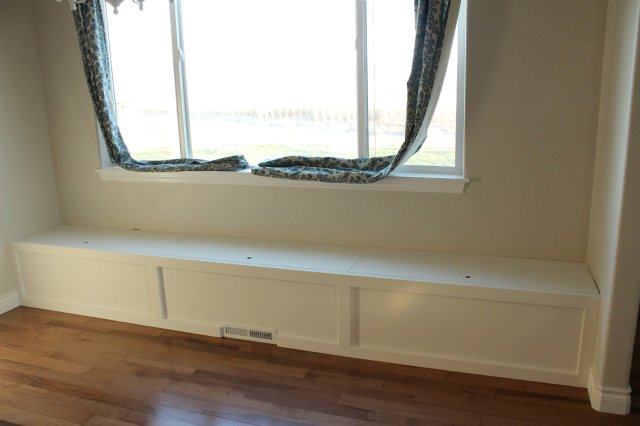
Breakfast Nook Bench

The living room sign was also an awesome project.
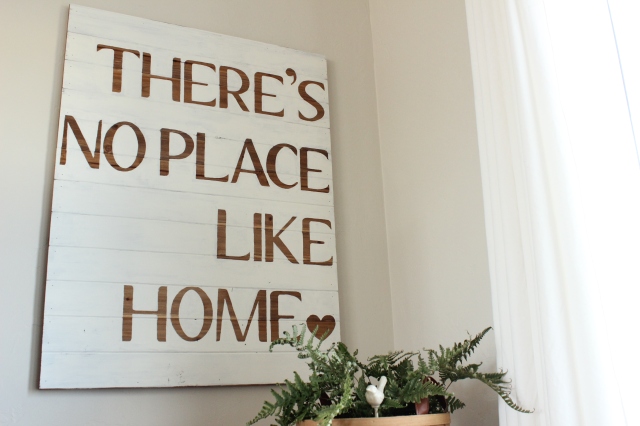
There's No Place Like Home

You all know how excited I was for our kitchen shelves!
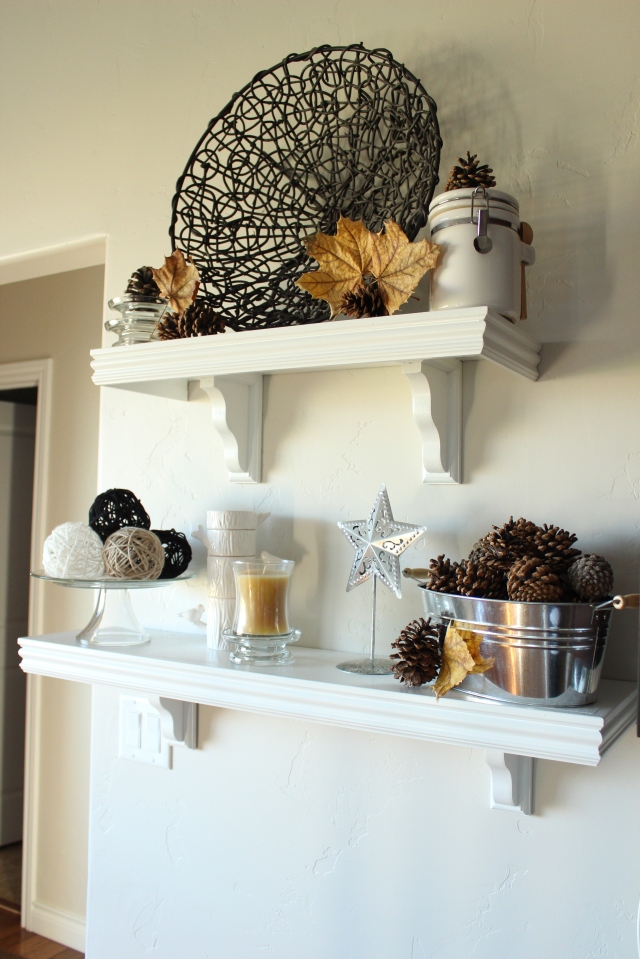
Kitchen Shelves

Our breakfast nook also received another update when I transformed the current dresser into a two toned beauty. See how I did it here.
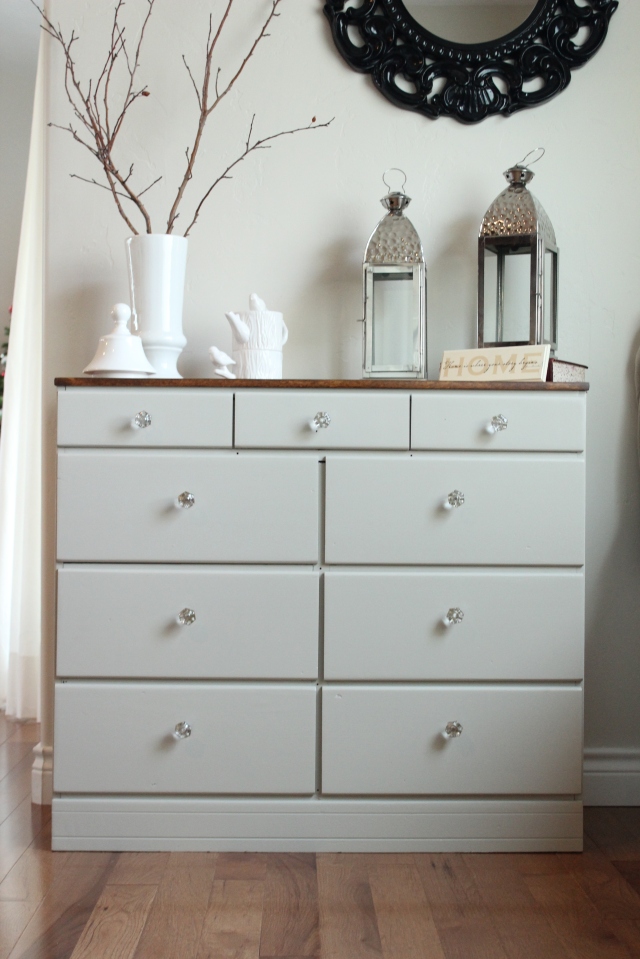
Two Toned Dresser

And finally, I loved showing you our Christmas house tour, which has links to all my favorite Christmas projects from 2012.
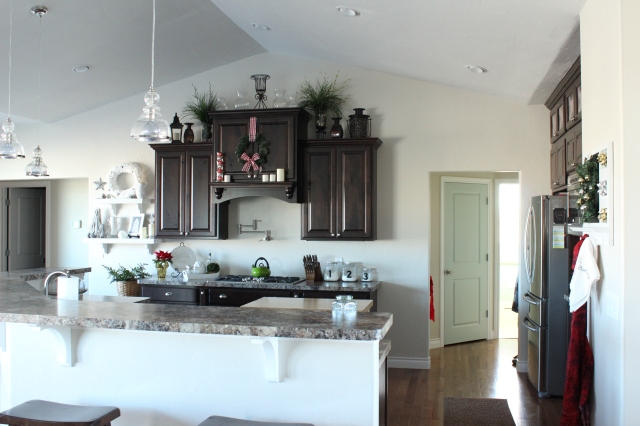
Christmas House Tour

Well, there you have it, all of my favorites from 2012. I can’t wait to see what 2013 will bring. We already have a whole list of projects waiting to be completed throughout the year. I’ll show you the list soon.

To all my readers, old and new, I can’t even begin to express how grateful I am to have you as followers. Your comments mean more than you will ever know!

Don’t forget- starting January 1st, my new site will go live and The Wood Grain Cottage will come to life! I’ll see you there!

blue & green signature

Linking up to:

Southern Hospitality

A Bowl Full Of Lemons

The 36th Avenue


There’s No Place Like Home

I’ve had a major crush on homemade signs and have wanted to make my own forever. I love how customizable they are to whatever space you want to add them to, plus you can get totally creative!

Honestly, this project would have been done sooner, but I had major indecisiveness when picking the wording… It was a problem and one that ate at me day and night. I had a list a mile long of potential wording, but nothing seemed right, or “fitting”. Then, one day randomly, it struck me!

There’s No Place Like Home.

How completely fitting for us. Especially since we are homebodies who think an awesome night is one spent at home. 🙂

Really, this sign was a labor of love! To say that it was extremely tedious is an overwhelming understatement…. BUT, it was totally worth the 10 hours it took to paint! (I wish I were kidding….)

Here’s what we did:

First off, we headed to Home Depot to get our lumber and frame supplies. I showed my drawing to the hubby and he basically figured out how he would build it. We ended up with cedar tongue and groove planks that slid together. I was a bit hesitant about having grooves for the painting process, but honestly, they didn’t effect it.

$24.00 later we were on our way home!

Once we got home, my hubs got busy building the frame. The size ended up being a large and in charge 32″ x 42″.

Once it was all nailed together we started the staining process.

While Anthony wiped on the stain (Minwax Early American), I took pictures, waited, and then wiped it off.

Once we had the color we wanted, which was one heavy coat, we let the stain dry completely. In reality, a day or two would be fine, but since I was in the indecisive mode and couldn’t pick a font or saying to save my life, ours sat for almost a week. Needless to say, that baby was dry!

After I finally decided on the saying, the next hardest step was picking a font… I must have tried at least ten, but nothing felt right. Finally, I ran into a font called Aubrey and instantly fell in love. It’s like the stars were finally aligning!

I typed up my saying in a word document and kept adjusting the size of the letters to fit on the boards. After several trial and errors, the letters ended up being the size 500.

I printed the letters on thick card stock and them cut them out, which was… time consuming… and placed them on the boards.

After playing around with the wording arrangement, I decided to align them on the right side. I used the yard stick to make sure the letters were evenly spaced throughout.


With the letters in their place, I used small pieces of two sided scrapbook tape to hold them in place. Once all the letters were stuck down, I took a pencil and traced them.

I ended up with a faint outline.

Next up was painting!

I must admit that I had to give myself a pep talk to start this step. I was so scared that it wouldn’t turn out the way I envisioned it. Fear struck me and I just knew I was going to ruin our lovely stained wood and all our hard work up to this point.

After telling myself repeatedly to “keep breathing” I dipped the paint brush into the paint and… sat there! Seriously, scared. I put the paint brush down, got a drink of water and told myself that there was no way I was stopping now. So, without giving it one more thought, I started painting.

As a side note, I ended up painting the entire thing by hand…. hence the 10 hours. I would have loved to use painter tape, but it didn’t work. I tested one small area and when I removed the tape it pulled off some of the stain. I quickly decided there was no way I was going to use it. I sucked it up and painted every single letter and curve with one small paint brush.

Sure, some of my letters don’t have the straightest lines ever, but you honestly can’t tell when it’s on the wall. Plus, I really like the handmade look of the sign.

I love the rustic vibe to the sign! And I totally didn’t mess it up! Sure, painting it was tedious, but I didn’t ruin it! Quite the opposite actually! And to continue the rustic feel, I didn’t give the white a solid coat of paint. I left spots of the wood peeking through and that’s probably one of my favorite things about the sign.

It’s like the sign was meant for that little corner. Plus, the saying is just perfect for us!

So, after 10 hours of tedious work I’m calling this project a BIG success!

Big Smiles!

I’m linking up to:

DIY ShowOff

Home Stories A to Z

A Bowl Full Of Lemons

Thrifty Decor Chick

Thankful Tree

Lately I’ve been focusing on our blessings… there are so many…. With Thanksgiving quickly approaching, I felt our home needed to have a daily display as a reminder for us to be continually thankful for each and every blessing that happens in our lives.

It’s an unbelievably pretty display, and one that catches my attention constantly.

I started with a tree limb from outside (much like this one), then pulled a plastic pot out of the garden shed and stuffed it with some green foam. From there I stuck the tree branch into the foam and wrapped the pot with burlap and tied it together with jute twine. Easy!

The next part was the most time consuming.

I knew there wasn’t anyway to hang all of our blessings on the tree… there aren’t enough branches! So, I chose several of them that easily came to mind.

From there, I typed them up in a word document, picked a pretty font and printed them on heavy card stock.

Next, I rummaged through my scrapbook paper stash and found a neutral pattern that was reversible. I actually ended up using the opposite side of the paper below, making the pattern below the back side.

This is everything I used:

I began by cutting each of our words into evenly spaced shapes.

Once all of the words were cut out, I started laying each one on the scapbook paper to form a border. Once I had an evenly spaced border on all four sides, I stuck a piece of double sided tape under the word and pressed the two together.

After I had all of the words done, I used a hole punch on the top of the paper (in the middle) and ran the just string through it. Once I had determined the string length, I simply tied the two ends together and hung them on the tree.

So EASY!

We just love the outcome!

This was such a simple project and something so very meaningful. Honestly, I love the way it looks in the house. I’m thinking about leaving it up for a while. After all, we could all use to be reminded of our blessing from time to time, right?

Try one in your home- you’ll love it!

Linking up to:

Home Stories A to Z

DIY Showoff

A Bowl Full of Lemons

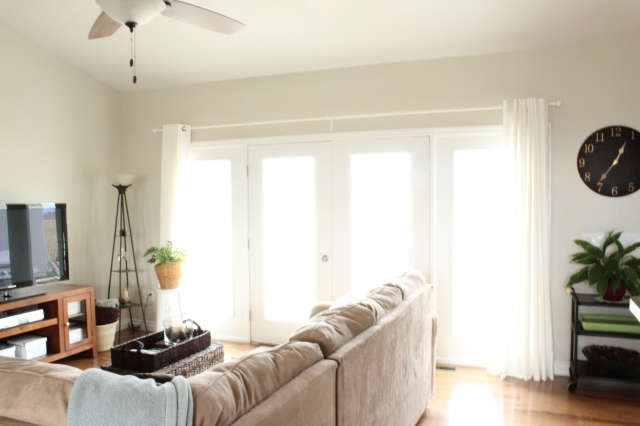
Living Room Curtains

Yes, I’m talking about curtains again. But this time they’re in the living room. They’re the same curtains that we put in the master bedroom, but we used the white rod from IKEA rather than the black one.

I must admit, I love how they brighten up the space. They’re not too “heavy” looking and I really like how they frame the windows and doors. It’s such a statement when you first walk into our home.

I had debated for.ev.er. about using a stencil on some plain curtains, but I’m honestly loving the fresh and clean look.

Let me just vent for a second… our windows and doors (all 4 of them together) are about 160″ long. Because of the length, any curtain rod that I could find was like $150 and over…. Who wants to pay that for a curtain rod? Certainly not me…

I seriously thought about DIYing a curtain rod with some PVC pipe and spray paint, but I knew that the paint would wear off over time leaving my OCD self with scratch marks all over the rod. Not only that, but this particular door/ window combo is the first thing people see. I was stuck between a rock and a hard place. I knew what I wanted, but couldn’t bring myself to spend the money to do it.

I cruised around the internet praying that I would find a cheaper alternative… Enter in IKEA and we have an amazingly cheap solution…. that’s actually legit. I found this and it totally changed my curtain rod world. With a price tag of $5.99, for a rod that extended to 152″, I knew that I could make it work. And umm, the $5.99 price is amazing!

Ok, I’m not going to lie. I was somewhat hesitant about the rod. It seemed too good to be true. So naturally I figured that it would be made out of a cheap and flimsy metal. This is so NOT the case. These rods are awesome! They are made of thick metal and even have a soft, rubber middle support so that the rod it’s self doesn’t scratch. We are so impressed with these rods… and for $5.99?! Next time I go back to IKEA, I’ll take three please.

And no, I wasn’t paid to say this about IKEA’s curtain rods… they don’t even know who I am… I just thought I would share my experience in case there are people out there going through the same, “I really need a long curtain rod, but totally don’t want to sell my arm to get one…”.

Anyways, we love the curtains (also from IKEA) and they’ve totally made the room brighter and lighter!

Major love here!

Big Smiles!

Bird In The Fern

Why yes, the title of this post is exactly what it states. I put a bird in our fern.

While cruising through target the other day I ran across a delightful set of three white ceramic birds. They looked happy and chirped their way right into my cart. They were an impulse buy, but I love them! Even though I’ve only found a home for one of them…

He looks happy! And noble.

Sure, the fern will eventually get too big for birdie, but that’s a while away. He’s got a perfect home in an extra sunny location.

I love simple things like this! Happy Days!

Living Room Secretary

Before I get busy on another furniture painting project, I felt it was necessary to show you the before pictures of our family secretary. It deserves more than just a quick before & after post because it’s been in my husband’s family for years! My husband grew up doing his homework on this secretary, so it holds many special memories for him.

It wasn’t too long ago that we were visiting his parents and I ran across it in the spare room. It was lovely! I told my husband how awesome it would be painted. At first, he thought I was crazy! He thinks that I want to paint everything. Ha, maybe I do!

I started to point out all of the ware and tear that it had suffered throughout the years and he finally came around to the idea of painting it.

After I got his approval I started to debate which color to paint it. First it was white, then it was gray, then back to white. I’ve been itching to paint it, but I couldn’t decide on the color. The last thing that I want to do is paint it, then wish I would’ve painted it the other color. It was better to just wait it out until I was positive.

I’ve finally decided, thanks to the latest Pottery Barn magazine. Right in time too… I was going crazy trying to decide.

My plan is to paint the entire thing white, except for the back of the inside, which will be a dark gray.

I can’t wait to get this project underway! It honestly feels wonderful to finally have decided.

Little Big Fern

There’s been a new addition to our living room! I’ve recently added the cutest little fern, and boy does it act big! I’m loving the bright pop of green that it brings to the space, plus the factor that it cleans our air. It’s a contributor, and I like that. 🙂

I’ve recently decided that I’m diggin’ the vibe houseplants put off. To date, I have three different plants. They bring a certain happiness to a space and I love their lush color. But don’t go thinking that I’m going to go all houseplant crazy on you and have like 10 in the same room… not happening. 1 yes, 10 no.

Our little fern is small, but not for long! It’s growing rapidly! Love. Seriously Love.


I’ll share more living room pictures a little later, but in the meantime let’s enjoy our little fern!

House Update: Drywall Part Three
Excitement is in the air! It’s been a happy day at the house. So much progress has been made and the house looks entirely different. I actually walked inside the house expecting to see a few 2 x 4 walls… crickets…. I stopped dead in my tracks! There are no 2 x 4 walls inside the house. Nope, nadda, zilch! They are covered!

Except the garage… which should be finished up tomorrow. But, the garage isn’t included in the interior portion of the house… so I’m calling the interior finished!

Can you BELIEVE this? I’m still in a bit of shock myself. For realz!

I mean, a few weeks ago we had this:

And then last week I left you with this:

But…. this is what it looks like NOW:

Notice the island wall… whoa!

Here’s what the rest of the house looks like:

Master

Master

Laundry room platforms!

Laundry room

Office

Guest Room

Mud Room

Garage

Garage- the only 2 x 4’s left!

So, pretty impressive right? I’m completely obsessed about this house and it’s amazing to see the completion date get closer. It’s an incredible feeling to know that this lovely house will be our home and we can’t wait to unpack our boxes, which have been in storage a very long time.

Unpacking… sigh… the thought is dreamy.

Style Board Series: Living Room

The living room. It’s one of the most important rooms in the house. Especially since it’s connected to the kitchen, dining room, breakfast nook and entry way. It’s called an open floor plan. And they can be tricky to design and decorate. Getting the rooms to flow together, but still have a little somthin’ somthin’ of their own is a tad tricky for me. Especially in the paint department.

I thought I had it all figured out, I really did, and then a color named gray happened. I was going to go all soft and creamy, but then I kept seeing inspirational pictures of rooms with gray paint (a faint gray color) and I’m rather enjoying it. My problem is that the kitchen is connected to the living room. And I don’t particularly want gray in the kitchen. Our cabinets are a dark chocolate color and I’m not sure how that would look with gray. Know what I mean? See my dilemma?

Here’s what I’ve came up with:

I really love it. The fun accessories, the bright pops of blue paired with the sweet hints of yellow. It’s too pretty. And cheerful! And the thought of mixing patterns and textures is completely exciting! It’s just the paint color that has become the challenge.  And not even really in the living room, but the kitchen.

Here’s what I mean:

Here’s the living room. The breakfast nook is to the top right, which is connected to the kitchen.

The kitchen, looking from the living room. It’s all one.

Sure, it’s completely possible that I just paint the wall behind the cabinets a different color. That would probably solve my problem. Seeing the cabinets in person would probably be extremely beneficial too. Fact of the matter is, I am wanting a more “seamless” look, if you will. All in good time.

Until then, feast your eyes upon these gorgeous living rooms:

(via)

(via)

(via)

(via)

(via)

(via)

(via)

(via)

Beautiful rooms, eh? I am completely loving the look of sectionals, mixed patterns, textures and bamboo roman shades with drapery. It’s big. And I am firm believer in the saying: “Decorate with what you love”!

Source Information:

Sectional- American Furniture Warehouse

Hardwood Flooring- Home  Depot

Coffee Table- Home Decorators Collection

Wall Mirror- Amazon

Trunk- Target

White Drapes- Target

Armless Chair- Target

Grey & White Pattern Pillow- Home Decorators Collection

Aqua Pillow- Fabric Junkie Etsy Shop

Grey & White Floral Pillow- Fabric Junkie Etsy Shop

Turquoise Glass Vases- Horchow

Pattern Rug- Horchow

Swing Arm Floor Lamp- World Market Cost Plus

Paint Color- Benjamin Moore Edgecomb Gray

____________________________________________________________________________________

What about you? Has anything made you re-think you decorating ideas? Any paint color picking woes? Feel free to share!

House Update: Insulation & Rock!

Who would have ever thought that we would be THIS excited to see insulation? After a week and a few days of waiting for mr. electrical inspector, we are finally making some more progress! And it feels AMAZING!

The house completely changed today… it got much smaller… in a good way! The walls are covered with insulation and the rooms are definitely distinct!

Take a look for yourself:

The view from the front door! Living room and breakfast nook.

And there’s a wall!

Dining Room!

Dining Room/ Entry

Kitchen!

Another kitchen view!

Laundry Room!

Laundry Room Pedestals!

Office!

Hall Bath

Guest Room!

Master Bedroom!

Master Bathroom & Closet. (The tub has been moved for insulation to be placed behind it.)

Our garage!

And now, the rock!

This rock… *sigh*… it’s stunning… *sigh***… We LOVE it! It’s beautiful!

Stucco is set to be installed this Friday, but possibly next Monday. We. Can’t. Wait.!!!

The excitement levels are rather high right now. It’s kind of like crunch time, which means…. it’s almost moving time!

Want to hear some more good news?!?

Dry wall starts Thursday! YES!

Pinch me now!