Favorite Projects of 2012

As we get ready to head into 2013, I thought I would take today to highlight my favorite projects from 2012.

We’ve had a very busy year, especially once our house was finished and we could start moving in.

In no particular order, below is a recap of my very favorite projects from 2012.

We love our painted stripes. They totally transformed our entryway!
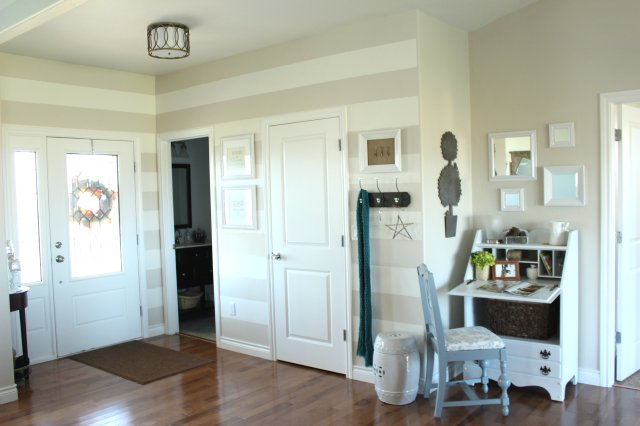
Entry Stripes

Our painted secretary– such a great transformation!
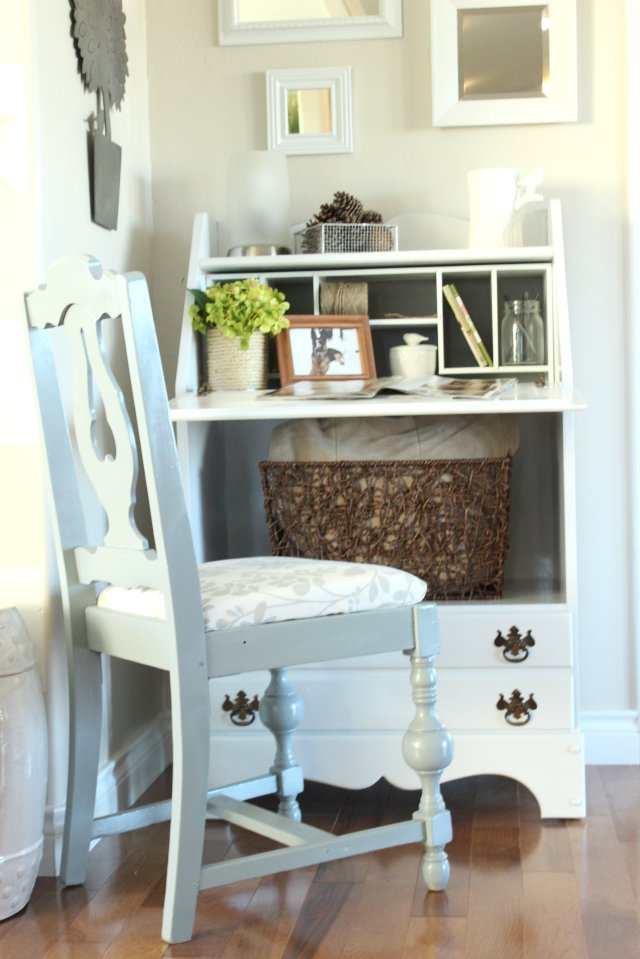
Painted Secretary

I also did my first big sewing project with our Breakfast Nook Curtains.  Although, they’re about to make an appearance in a different room.
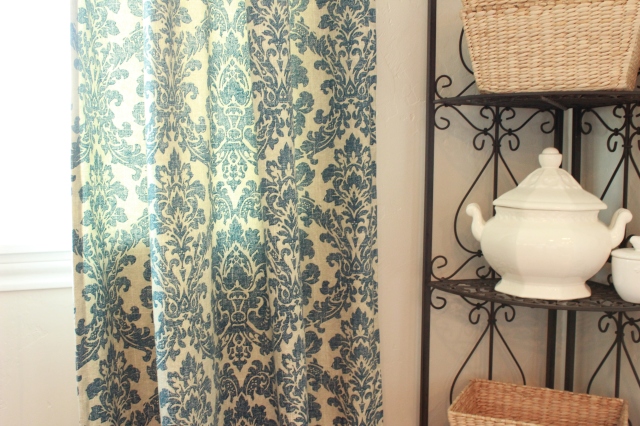
curtains 4

And I loved the outcome of my painted sewing machine table.

Paintec Sewing Machine Table

One of my favorite free projects was easily the burlap and stick welcome banner. It’s still hanging up! 🙂
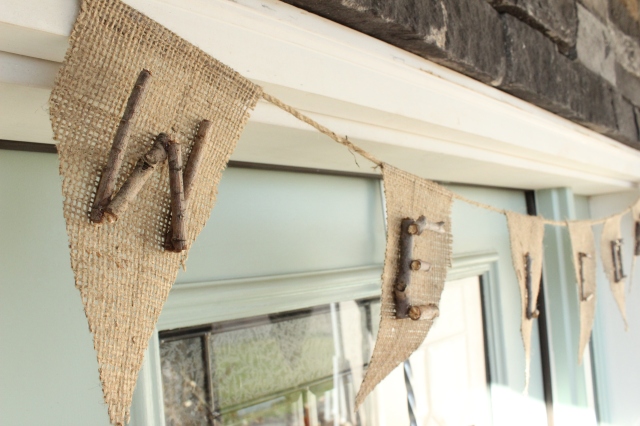
Burlap & Stick Welcome Banner

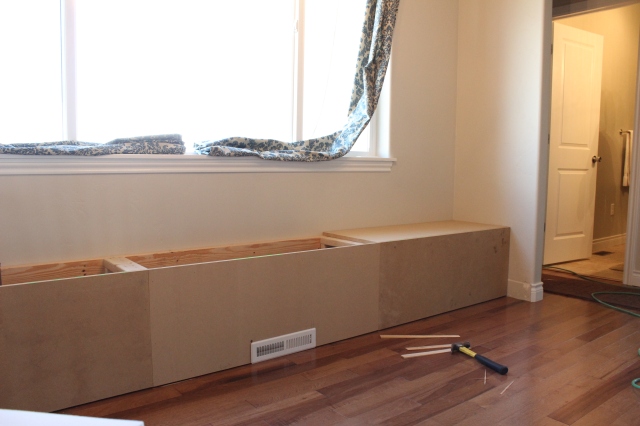
Possibly the most exciting “big” project we accomplished this year was the breakfast nook bench. It’s amazing how much it has changed the space and I absolutely can’t wait to finish the room in 2013!
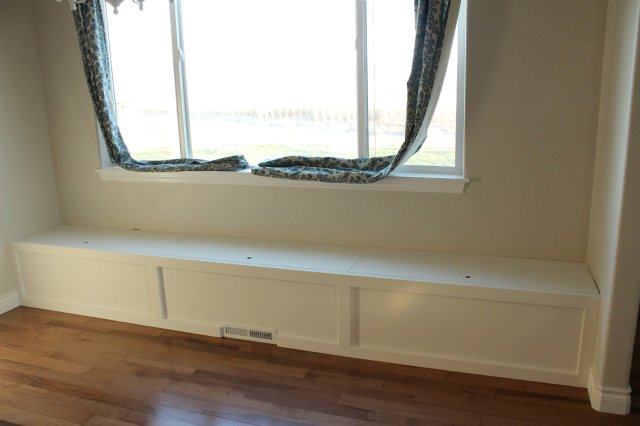
Breakfast Nook Bench

The living room sign was also an awesome project.
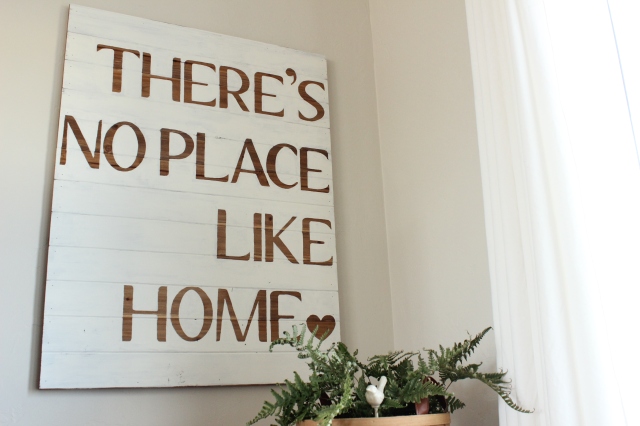
There's No Place Like Home

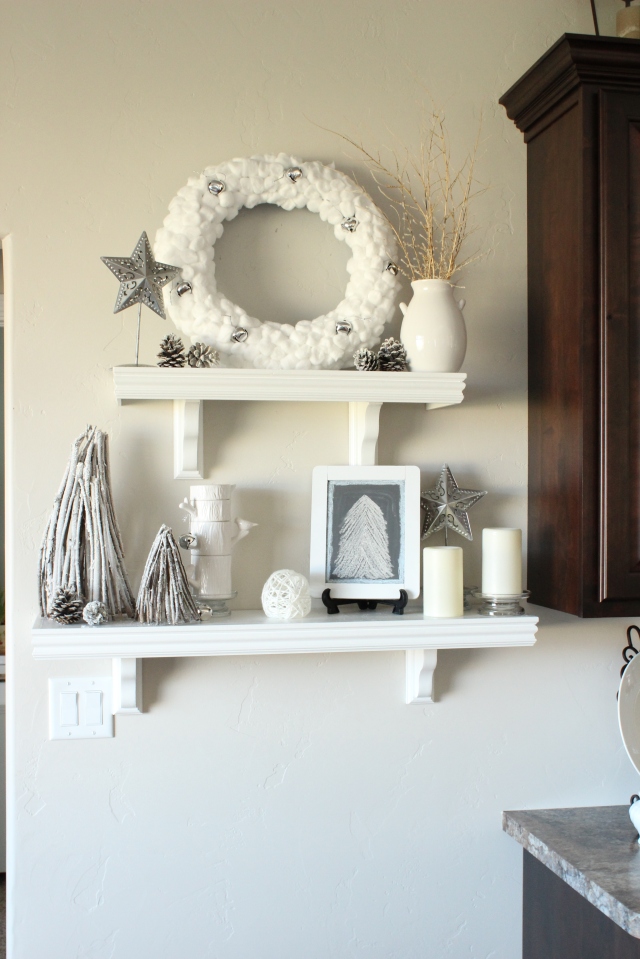
You all know how excited I was for our kitchen shelves!
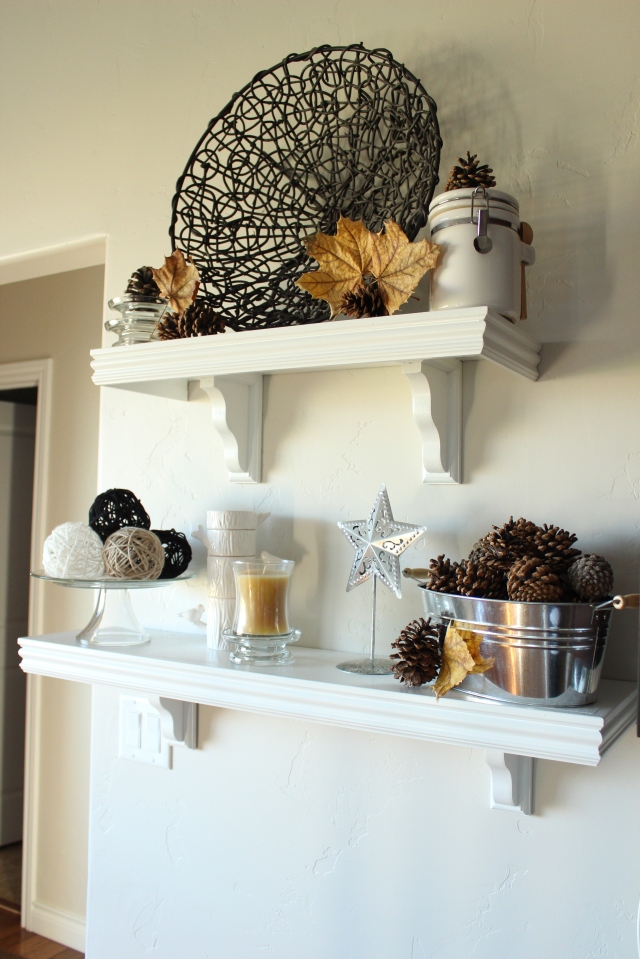
Kitchen Shelves

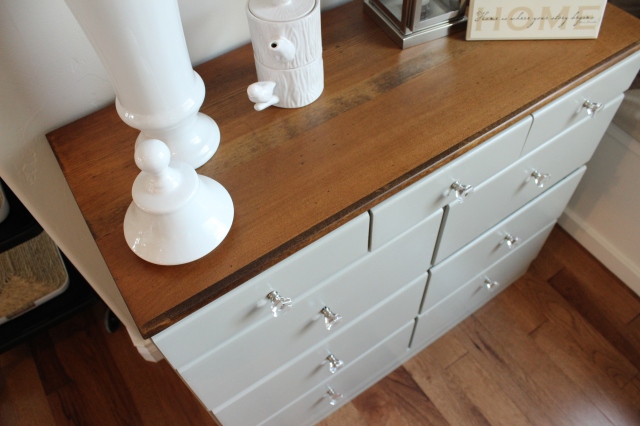
Our breakfast nook also received another update when I transformed the current dresser into a two toned beauty. See how I did it here.
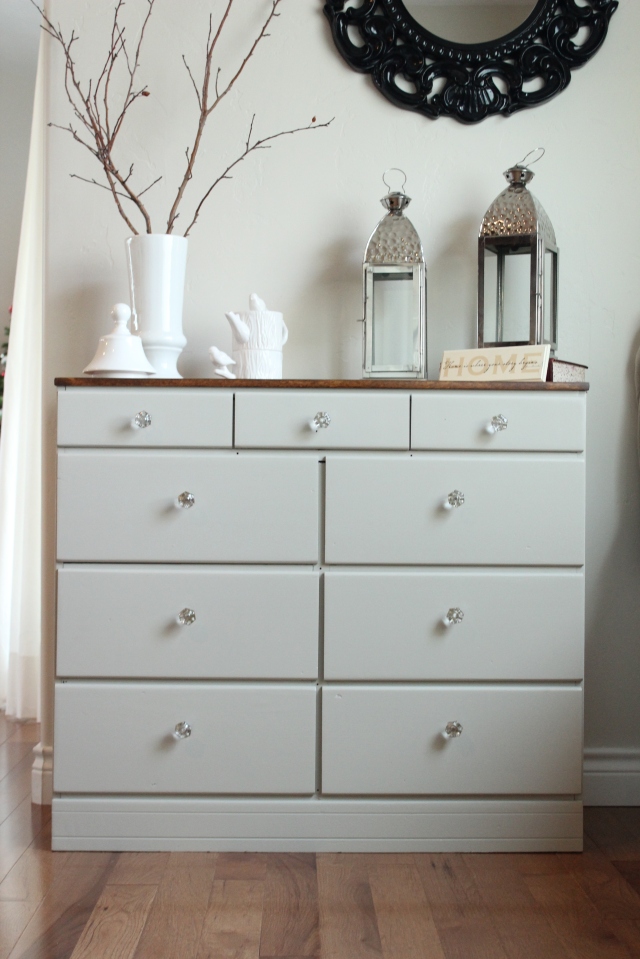
Two Toned Dresser

And finally, I loved showing you our Christmas house tour, which has links to all my favorite Christmas projects from 2012.
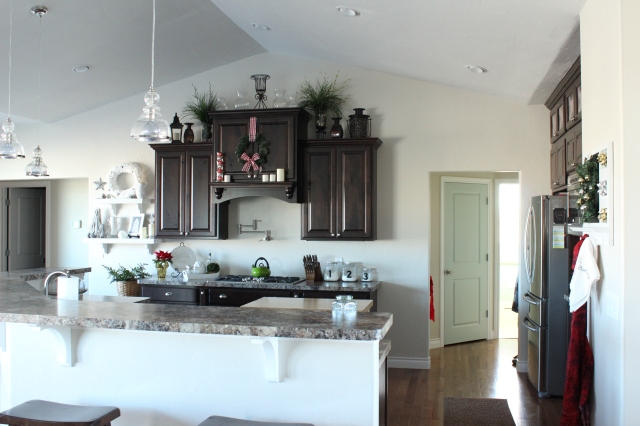
Christmas House Tour

Well, there you have it, all of my favorites from 2012. I can’t wait to see what 2013 will bring. We already have a whole list of projects waiting to be completed throughout the year. I’ll show you the list soon.

To all my readers, old and new, I can’t even begin to express how grateful I am to have you as followers. Your comments mean more than you will ever know!

Don’t forget- starting January 1st, my new site will go live and The Wood Grain Cottage will come to life! I’ll see you there!

blue & green signature

Linking up to:

Southern Hospitality

A Bowl Full Of Lemons

The 36th Avenue


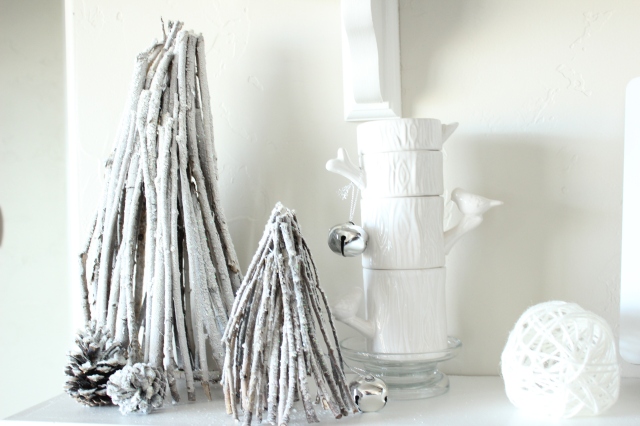
Easy Christmas Craft- DIY Frosted Trees

Hello!

First off, thank you all for your kind and happy comments about our Christmas shelves. We love them too! 😉

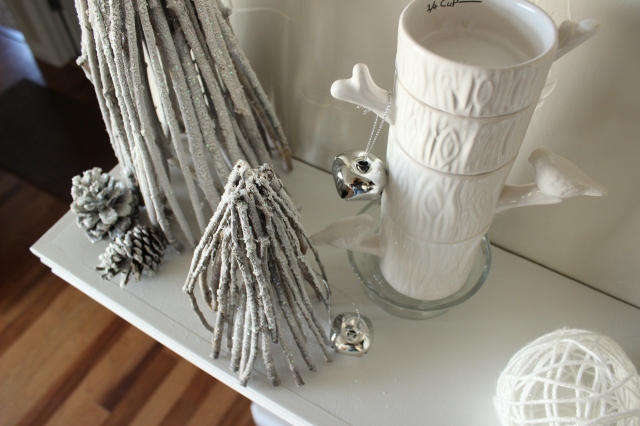
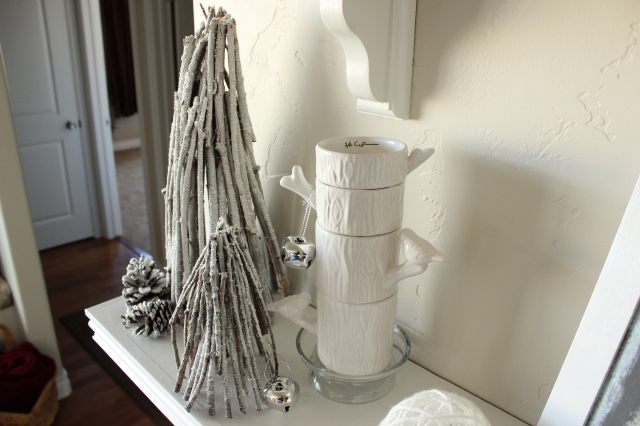
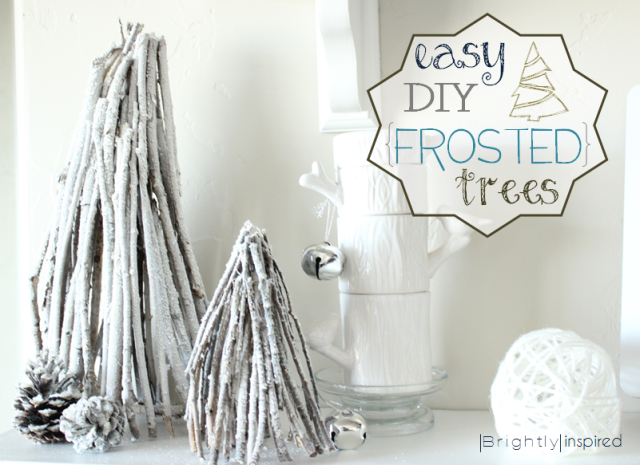
Today, I’m showing you how I made my super easy and super cheap Frosted Twig Trees. (Say that three times fast!)

3

Like I mentioned in my original post, I really didn’t want to spend any money on decorations this year. So, l did what I normally do, and went outside to see what I could find.

Because we have about 5 trees that shed like crazy, my first thought was to use the sticks and twigs for something. I gathered up as many as I could find, which ended up being a large amount.

Once I brought them inside I figured they would look pretty awesome is they were “frosted”. Ding! The light bulb went off and I envisioned trees.

What a good little light bulb it was! 😉

For this project you will need:

-Lots of sticks in about the same size length

– Hot glue gun & glue sticks

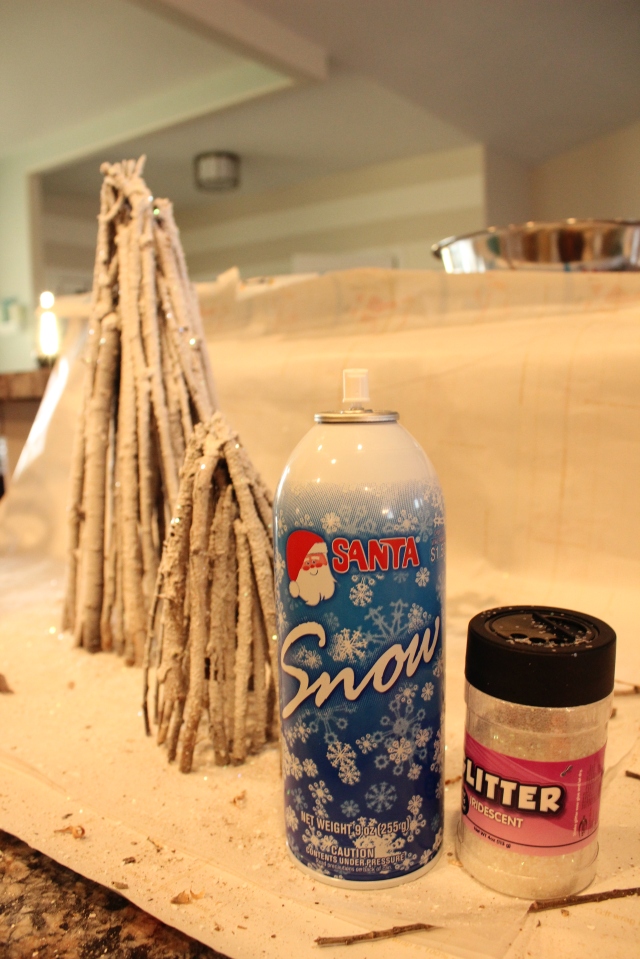
– Snow spray, white spray paint would work, but I wanted a little “rougher” texture

– White glitter

– Spray adhesive

Step One:

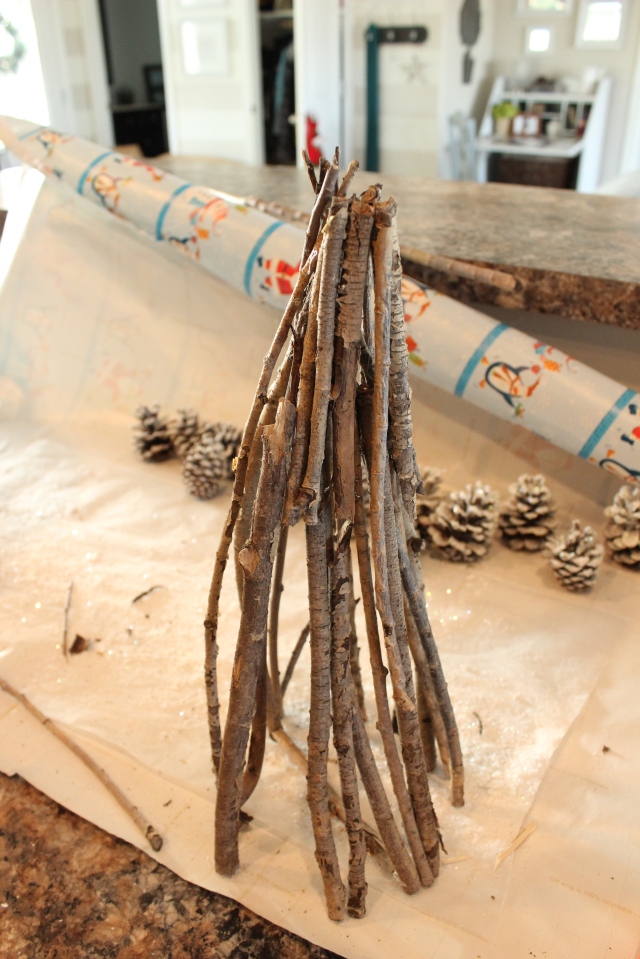
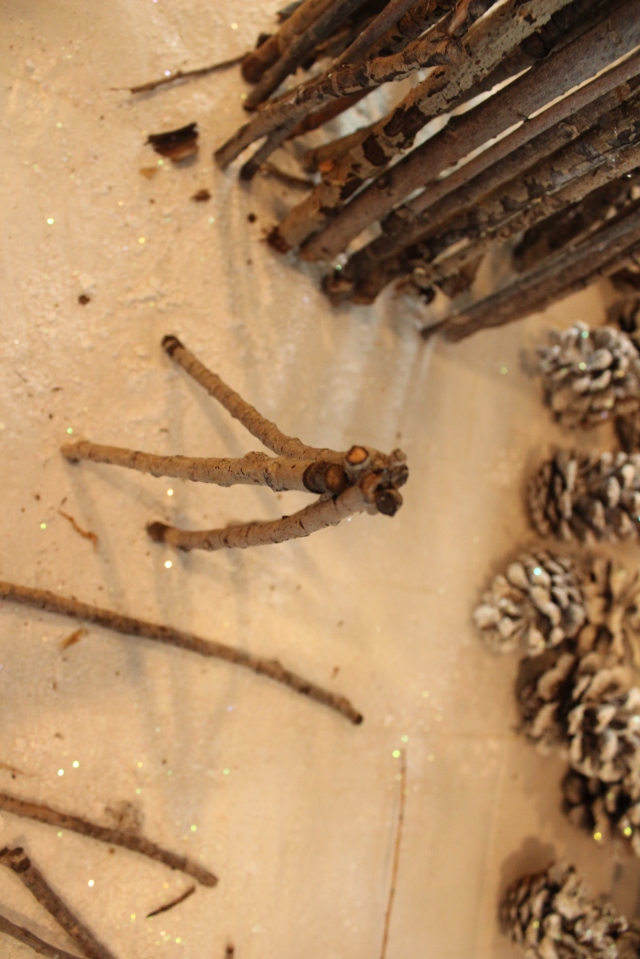
Grab four sticks that are the same length. Take two of them and hold the top of the sticks (which will be the top of your tree) together. Spread them apart at the bottom (with your fingers holding the top of the sticks together) to form one side of the tree. With your free hand, grab the hot glue gun and drop some hot glue on one of the sticks at the top. Stick the two sticks together. While the hot glue is still wet, spread the bottom of the two sticks as far apart as you want the base of the tree to be.

Step two:

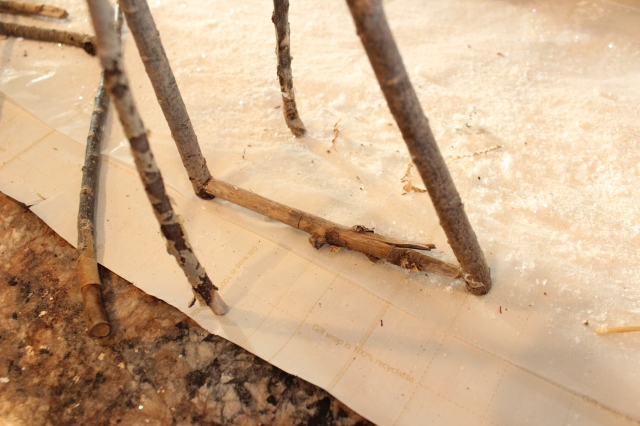
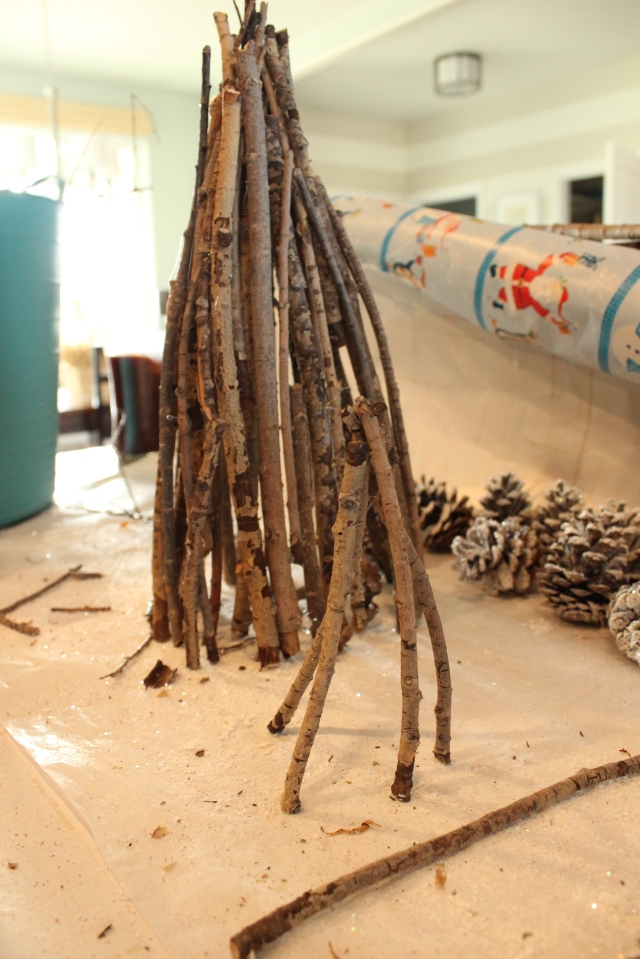
With the top of the two sticks attached with hot glue, break a stick so that it fits snugly in between the bottom of the two sticks. Hot glue it in place. I used this as a brace to hold the sticks together at the bottom. See the picture below.

2

Step three:

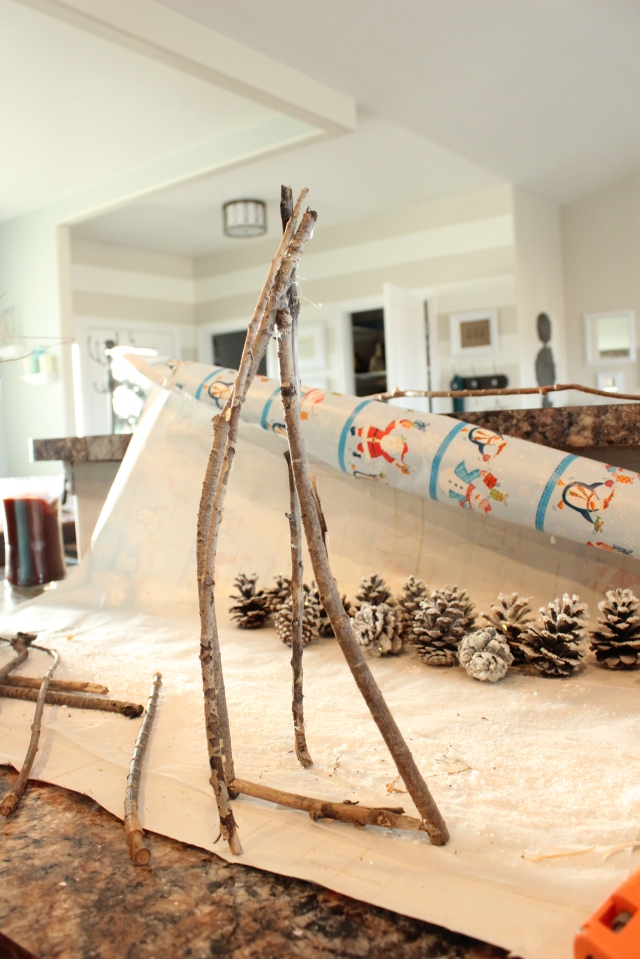
Now, hot glue the other two sticks at the top, placing them on the opposite sides, like the picture below. Be sure to spread them apart at the bottom, giving the tree its form.

1

Step four:

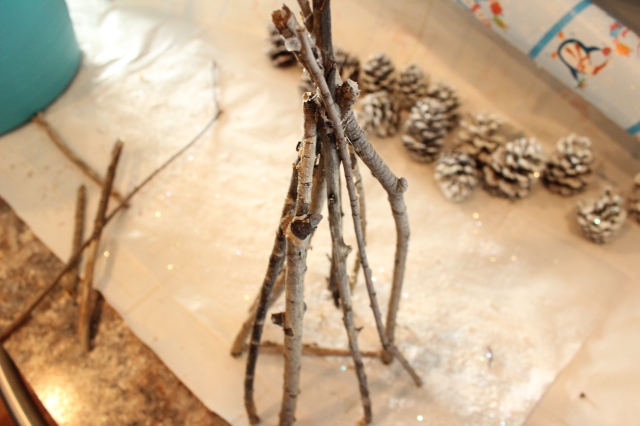
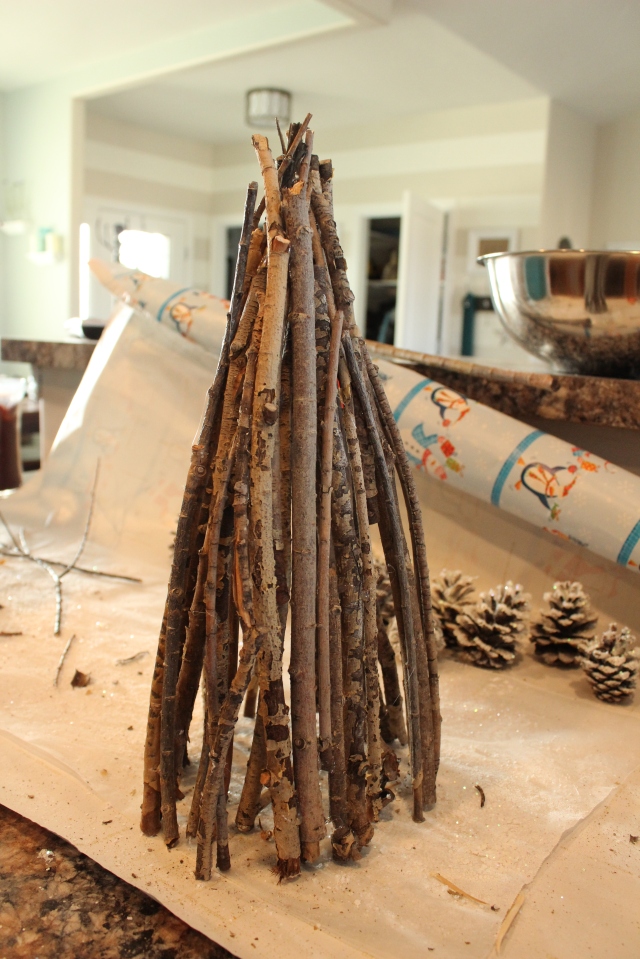
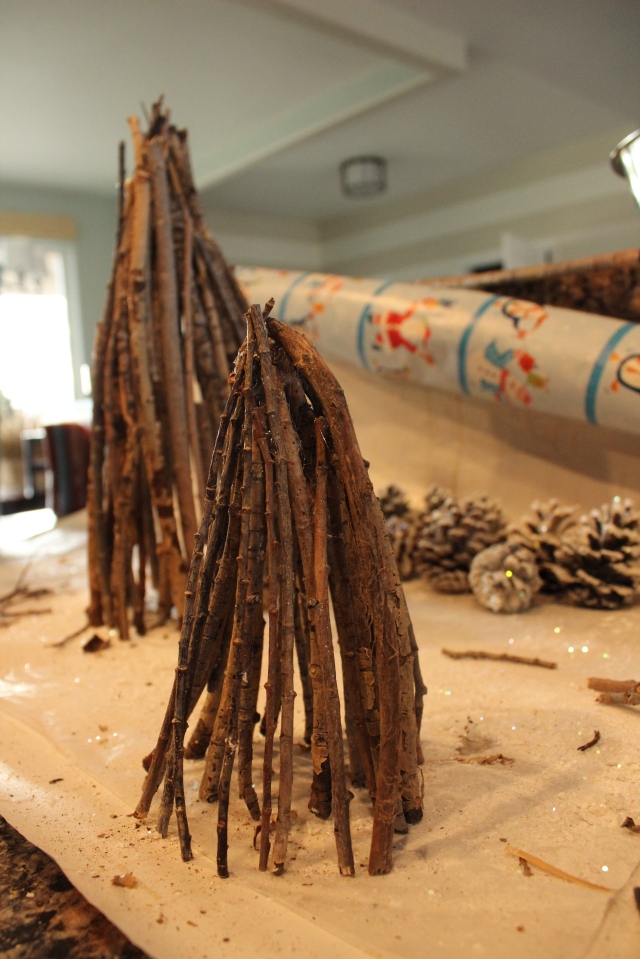
Grab several of your sticks and start hot gluing them to the form of your tree. Be sure to hot glue in between some of the sticks, as well as gluing the top. You don’t want your tree to fall apart!

4

5

To give the tree some dimension, I decided to leave some areas open. And because not all of my sticks were long enough, I glued some shorter ones to the top and middle of my tree. It gave it some awesome depth and texture!

6

You’ll probably also notice that not all of my sticks are straight. Mother nature isn’t perfect and my trees aren’t either! They have curves and bends and a lot of the sticks have different texture. It makes it all the better!

With the big tree done, I made my second tree, which I wanted to be smaller. Same steps, but this time I didn’t use a brace to support the bottom since it was going to be a smaller tree.

Just glue the tops together and spread the bottoms apart…

7

8

Then add your other sticks and hot glue in place…

9

With both of the trees done, let’s add the snow!

11

Step five:

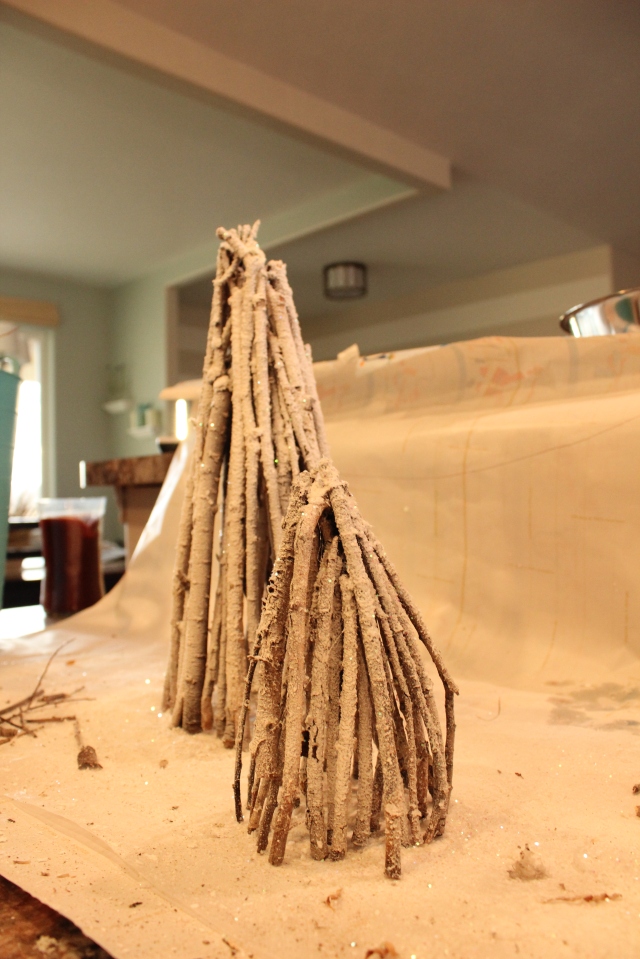
Now, with the snow spray, give your trees a nice coat. How thick you make it, or where you spray the snow is entirely up to you. I tried to think about where the snow would land naturally and spray in those areas.

*A fair warning: make sure you have some sort of paper or card board set up to catch the over spray. The trigger on this isn’t nearly as nice as the one on spray paint and the snow comes out full force- whether you want it to or not. 🙂 Not like I know from experience or anything.

Step six:

Sprinkle on the glitter and let it fly. You can pick how thick and even you make it. I kept shaking the bottle until I thought it was covered.

Step seven:

Spray on a *light*, but even coat of spray adhesive.

Step eight:

Sprinkle on more glitter.

Step nine:

Spray on another *light* coat of spray adhesive.

Step ten:

Let the trees dry! I let mine dry for about 24 hours. The length of drying time will really depend on the thickness of the snow. However, the can says not to spray it on too thick or it won’t dry. I’d follow that!

Step eleven:

Be patient. You really want them to be as dry as possible!

*Side note # 1- The snow spray will seem like it won’t dry and that it could be easily be wiped off. The spray adhesive really helps with this, but make sure you don’t “man handle” the trees when they’re dry. The need to be handled gently and with care.

*Side note #2- Some glitter will fall off. It’s just the way it goes. The spray adhesive should help glue it to the snow.

*Side note # 3- The spray adhesive will make the snow crackle a little bit, but it only gives the branches more texture.

*Side note #4- Since you are using hot glue, you will have a few hot glue strands that will become noticeable after your spray on the snow and spray adhesive. I took a pair of tweezers and gently pulled them off. All better!

10

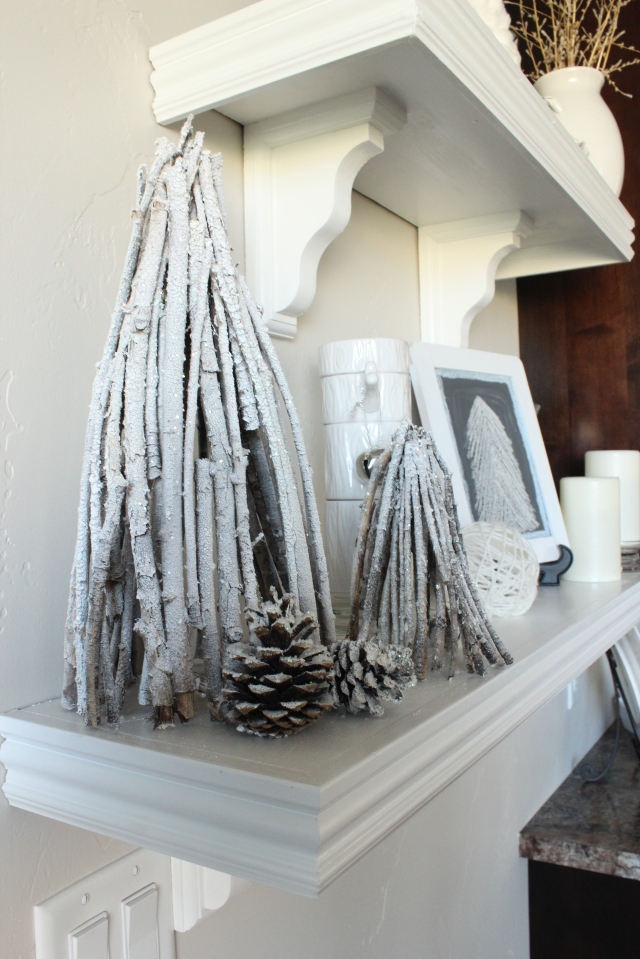
Once they’re dry, gently place them where you want them!

12

11

10

1

Main

Really, these trees can’t be messed up. The hardest part is allowing them to dry.

And the price of these couldn’t be better! All the supplies I needed are found at Wal-Mart.

Sticks- Free

Glitter- $2.50

Snow Spray-$1.50- I think…

Adhesive- I had on hand.

Total Cost: $4.00

Boo Ya!

I’ve also been informed by several lovely readers that you can find these similar trees at Target, but I’m sure the price isn’t anywhere near mine! 😉

If anyone has a better method than using the snow spray, I’d love to hear it. I thought about using the white spray glitter, but it doesn’t provide the “snow” look, which is what I wanted and what really makes these trees shine!

Next up is the cotton and jingle bell wreath, which I did see at Target. Mine is definitely cheaper than Target and it’s too easy!

Big Smiles!

blue & green signature

Linking up to:

The 36th Avenue

House of Hepworths

Centsational Girl

DIY Showoff

Fox Hollow Cottage

It’s Overflowing

Classy Clutter

Shanty 2 Chic

Inspired By Charm

It’s Overflowing Craft Link Party

Design Dining and Diapers

Breakfast Nook Dresser: Two Toned Transformation- How To

Last week I showed you our newly transformed dresser. And because I am so happy with the way that it turned out, today I’m showing you what I did.

First off, I headed to Walmart to buy some paint stripper. I followed the directions on the container and ended up doing it 2 times to remove most of the paint. Very easy, but just make sure you apply a nice thick & even coat!

After I scrapped off all the paint, I got busy sanding! With our large sander, going with the grain, I sanded down the entire top until the black paint & gray primer was completely removed. Be patient.

Because I was staining the top, I sanded down the front and sides as well. I also made sure the surface was super smooth.

After the sanding was finished, I wiped down the top & sides with a microfiber towel, followed by a cheesecloth. Leave no dust behind!

Next, I picked out my stain. I originally planned on using Minwax Early American, but I tested a small spot on the side of the dresser and it was REALLY dark!

(I freaked, which I shouldn’t have, because I could have just sanded it off….)

After that I played around with several different colors, some together & some not, and ended up with Provincial by Minwax.

I found that the sides of this wood (pine) stained darker than the top. I barely wiped the stain on the sides before I wiped it off again and it was DARK. It threw me for a loop. So, I tried about 4 colors on the side, but I didn’t like any of them. They were too light. The dark color looked the best, so I decided to do it on the top.

Thinking it would do the same as the sides, I wiped it on and off again quickly. It hardly touched it. So the next time I let it sit a tad longer…. still not as dark as I was going for.

I could see that I wasn’t going to get the color I wanted with the Early American stain, so I grabbed the darkest stain in our cupboard, Provincial by Minwax. Boy did this scare me… it was dark…

I spread the entire top with the stain, wiped it off, and it gave me a slightly darker color… rather than doing the same, wipe on, wipe off for the next hour, I decided it was time to just go for it. I put a thick coat of stain on the top and waited.

After about 10 minutes I wiped off the stain and could tell it was getting darker. I did it again and waited another 10 minutes. This time I wiped it off and it was perfect! Finally!

I called it a night and waited until the next day to spray on a sanding sealer. Once that was dry, I LIGHTLY sanded the top with 220 grit sandpaper, going with the grain, and wiped it down with cheesecloth. Then, I sprayed on two coats of a satin poly. I didn’t want a super thick or shiny coat, so satin was the way to go.

Once the top was dry, I taped off the edges with Scotch Blue Delicate Tape and started painting. For the color, I chose Martha Stewart’s Mourning Dove. I had it mixed in a water based enamel with a semi gloss sheen. Not too shiny, not too dull. Just right. 😉

When it was dry, I reinstalled my knobs and waited a day or so before moving it back inside the house.

3

Honestly, nothing about this project was hard. A little time consuming, yes. But not hard.

It was totally worth the work and we love the outcome! Plus, it has totally changed my feelings towards our current table. Without planning it, the stain on the dresser matches the table. For now, the table stays.

Here’s my advice to you: if you have a piece of furniture that you really want to transform but are frozen with fear, quit it! Trust your instincts! Don’t let fear stop you. And certainly don’t be afraid of paint or stain. They don’t bite!

Now get out there and transform- you won’t be sorry!

Big Smiles!

Linking up to:

Thrifty Decor Chick

Breakfast Nook Update: Refinished Dresser

Hello and Happy Friday!

I’m back with yet another breakfast nook update. Now that we have added the bench, it’s prodded me to finish several other projects that I’ve been wanting to accomplish.

When I originally told you about the breakfast nook changes, I showed you my to do list:

1. Make a bench out of existing cabinets the full length of the window. Hopefully I can find the cabinets at Habitat for Humanity to save on cost. Fingers crossed!

2. DIY a bench cushion.

3. Hem curtains to allow for bench.

4. Get new pedestal table. I’ve been searching Craigslist and think I might have found one on the cheap. Just a little paint and elbow grease and we’ll have a show stopper.

5. Find new chairs for the table.

6. Find & install a new light fixture.

7. Make new DIY artwork.

8. Find new rug.

9. Accessories, Accessories, Accessories!

However, what I didn’t include on the list was refinishing the dresser.

Much like the table, it’s an important piece to the room. And one thing I never liked about the dresser was that it clashed with our current table and chairs.

Now, for a little history on the dresser. This was the first piece of furniture that I bought on the cheap with the intention of refinishing. Spray paint had also rocked my world around the same time, so, naturally we spray painted the entire thing black and changed out the knobs. Needless to say, this was a HUGE improvement to its previous condition. I really liked the look of the black.

Then, we moved in to our house and it’s new found home was in the breakfast nook posing as a sideboard rather than a dresser.

For six months I have looked at the breakfast nook knowing that there were several things “missing” or “out of place” and for six months I had been looking for the solution. Little did I know at the time, but the black dresser was prohibiting my true inspiration and ideas for the space. Sounds deep, I know.

After we installed the bench, I knew my next step was to transform the dresser. I kept imagining a totally different look and vibe. Something softer, more natural, with furniture that didn’t instantly “grab” or “take over” the room. The dresser kept doing that.

Now, for the record, I have nothing against black furniture. Obviously I think it’s striking, or I wouldn’t have painted it that way in the first place. Problem was, I kept trying to make it “fit” and it wouldn’t. It needed painted. And I was finally ok with doing it.

Inspiration hit not long after, and I had my solution.

This dresser underwent my first “serious” renovation. It didn’t include spray paint, and it didn’t include one solid color. Two toned was the way to go!

I wish I could show you the full room so that you could see the impact it’s had on the space, but you’ll have to wait!

Here it is all by it’s lonesome!

I am completely smitten with it’s two toned finish and the way the stain compliments the paint. It’s pure loveliness with a touch of rustic!

I’m totally impressed with how much better my accessories look! They’re no longer competing for your attention…

I left all of the original nicks and nail holes. They give it the slight rustic look that I was wanting. It’s not perfect and it looks like it has it’s own story.

This was such a rewarding project and one that taught me so much. I found that staining wood isn’t something to be afraid of. It won’t bite and it’s fixable- just grab your sander!

The more that I work with furniture, the more that I like it. Seeing these transformations is enough to keep me going!

Stay tuned for the step by step guide on how I transformed this dresser.

Big Smiles!

I’m linking up to:

Miss Mustard Seed

A Bowl Full Of Lemons

House of Hepworths

The 36th Avenue

Alderberry Hill

DIY Show Off

Laundry Room Console Table

I’ve been bitten. By the furniture bug, that it.

The laundry room is getting ready for a complete makeover. Remember? We talked about this. I shared everything that’s  been brutally bugging me since we moved in. Happy times.

Anyways, I was cruising around the great www and I ran into a lovely console table that practically had my name etched into it. It was completely perfect, except for the depth, oh, and perhaps the price…

Yes, at $1,099 this table is quite the catch.

Source

Ah, but look at all the loveliness! The thick wood top with the iron frame. It’s a perfect mix.

And, it’s similar to the original inspiration that I showed you before:

Source

But, like I stated before, my dream table is $1,100, which is way, WAY, way out of our budget. Luckily for me, the hubby is a welder by trade. I showed him a picture of my table and he actually laughed out loud, and then followed it with “I’m in the wrong business”. He can make it for mere dollars, but the most challenging, and perhaps the most expensive part, will be finding that thick of a wood top. I’m on the hunt.

I can’t wait to show you the finished project. And I can’t wait to see the finished price! I do love a good challenge!

Big Smiles!

Breakfast Nook Update: The Bench

Helloooo! As you may have noticed, I took a few days off for Thanksgiving. 🙂

Since this is the first year in our new house, we hosted Thanksgiving. It was lovely. Needless to say, I was busy, busy, busy! From cooking, to cleaning, to crafting, I was doing it all!

A big part of the “rush” would be because we just finished building our breakfast nook bench! Eeekkk!

It’s turning out wonderful and I can’t wait to show you the end and “final” result.

However, this post if all about building the bench.

Here’s how it went down:

First off, we cleared out the room and pulled up the existing baseboard.

Next, we measured, and double measured, the length of the wall and my Mr. built the bottom frame of the bench.

(P.S.- I totally apologize for all my “orange” pictures… we were mostly doing this project at night and I’m still trying to figure out all the settings on my new camera. Of course, I figured out how to take better pictures at night AFTER this project was over… SORRY!)

As you’ll notice in the above picture, we had to notch around our existing vent. The best way to do this was to build around it.

Once the base of the frame was down, he started adding the sides.

After the sides were up, we added the front and back supports.

Just like the vent, we had to notch around the two electrical outlets…

With the frame finished, my hubby started cutting the MDF for each “box”.

After the front was covered, he started cutting the MDF for the top of the bench. The top of the bench, or lid, sits on top of the frame.

This picture doesn’t show it, but we framed a box around the vent hole and used a narrow roll of insulating foam to go around the bottom of the frame. After that, it was completely air tight and we attached the new vent cover to the front of the bench. Easy peasy!

Once the entire thing was covered with MDF and the lids were cut, we started drilling the holes for the lids.

With the holes drilled, the hubby started trimming out the front.

After caulking, it was finally time to paint!

I know that in my original post I talked about making the bench out of pre-made cabinets. After doing a whole lot of research, I found that it really wasn’t that great of a deal. We needed three cabinets which would have made the cost around $230. And that was just for the cabinets. As well as the price, I really didn’t like the idea of using cabinets. The storage capacity didn’t seem that great and I wasn’t digging the idea of the doors opening into the furniture. I felt like I would have to move the furniture to get the cabinets open, which would make it hard to actually use the bench as storage.

With that in mind, we designed this bench to be a power house for storage. Since the lids open from the top, I can just lift them up and stick things inside. Perfect!

We spent around $90 on the bench, which is WAY better than the $230 that the cabinets would have cost. Plus, I LOVE ours! I can’t even remember the breakfast nook without it. That makes it pretty awesome!

Next up is the cushion. This room is coming together just like I imagined… maybe even better!

Big Smiles!

Linking up to:

A Bowl Full of Lemons

Home Stories A to Z

House of Hepworths

The 36th Avenue

There’s No Place Like Home

I’ve had a major crush on homemade signs and have wanted to make my own forever. I love how customizable they are to whatever space you want to add them to, plus you can get totally creative!

Honestly, this project would have been done sooner, but I had major indecisiveness when picking the wording… It was a problem and one that ate at me day and night. I had a list a mile long of potential wording, but nothing seemed right, or “fitting”. Then, one day randomly, it struck me!

There’s No Place Like Home.

How completely fitting for us. Especially since we are homebodies who think an awesome night is one spent at home. 🙂

Really, this sign was a labor of love! To say that it was extremely tedious is an overwhelming understatement…. BUT, it was totally worth the 10 hours it took to paint! (I wish I were kidding….)

Here’s what we did:

First off, we headed to Home Depot to get our lumber and frame supplies. I showed my drawing to the hubby and he basically figured out how he would build it. We ended up with cedar tongue and groove planks that slid together. I was a bit hesitant about having grooves for the painting process, but honestly, they didn’t effect it.

$24.00 later we were on our way home!

Once we got home, my hubs got busy building the frame. The size ended up being a large and in charge 32″ x 42″.

Once it was all nailed together we started the staining process.

While Anthony wiped on the stain (Minwax Early American), I took pictures, waited, and then wiped it off.

Once we had the color we wanted, which was one heavy coat, we let the stain dry completely. In reality, a day or two would be fine, but since I was in the indecisive mode and couldn’t pick a font or saying to save my life, ours sat for almost a week. Needless to say, that baby was dry!

After I finally decided on the saying, the next hardest step was picking a font… I must have tried at least ten, but nothing felt right. Finally, I ran into a font called Aubrey and instantly fell in love. It’s like the stars were finally aligning!

I typed up my saying in a word document and kept adjusting the size of the letters to fit on the boards. After several trial and errors, the letters ended up being the size 500.

I printed the letters on thick card stock and them cut them out, which was… time consuming… and placed them on the boards.

After playing around with the wording arrangement, I decided to align them on the right side. I used the yard stick to make sure the letters were evenly spaced throughout.


With the letters in their place, I used small pieces of two sided scrapbook tape to hold them in place. Once all the letters were stuck down, I took a pencil and traced them.

I ended up with a faint outline.

Next up was painting!

I must admit that I had to give myself a pep talk to start this step. I was so scared that it wouldn’t turn out the way I envisioned it. Fear struck me and I just knew I was going to ruin our lovely stained wood and all our hard work up to this point.

After telling myself repeatedly to “keep breathing” I dipped the paint brush into the paint and… sat there! Seriously, scared. I put the paint brush down, got a drink of water and told myself that there was no way I was stopping now. So, without giving it one more thought, I started painting.

As a side note, I ended up painting the entire thing by hand…. hence the 10 hours. I would have loved to use painter tape, but it didn’t work. I tested one small area and when I removed the tape it pulled off some of the stain. I quickly decided there was no way I was going to use it. I sucked it up and painted every single letter and curve with one small paint brush.

Sure, some of my letters don’t have the straightest lines ever, but you honestly can’t tell when it’s on the wall. Plus, I really like the handmade look of the sign.

I love the rustic vibe to the sign! And I totally didn’t mess it up! Sure, painting it was tedious, but I didn’t ruin it! Quite the opposite actually! And to continue the rustic feel, I didn’t give the white a solid coat of paint. I left spots of the wood peeking through and that’s probably one of my favorite things about the sign.

It’s like the sign was meant for that little corner. Plus, the saying is just perfect for us!

So, after 10 hours of tedious work I’m calling this project a BIG success!

Big Smiles!

I’m linking up to:

DIY ShowOff

Home Stories A to Z

A Bowl Full Of Lemons

Thrifty Decor Chick

Kitchen Shelves

I have major excitement today… this weekend I was able to talk my sweet, sweet husband into helping me finish a DIY project that I’ve been dreaming about and planning for forever.

You know I really like something if I haven’t changed my plans for two months… that’ll happen around our abode. I like to change things around a lot. 😉

This DIY project  is really nothing new to the blog world. Kitchen shelves have popped up everywhere. And, as I found out this weekend, for good reason. They’re awesome. And, oh so versatile.

First off, I had a really great reason for wanting these shelves… amongst their obvious beauty of course.

We don’t have a fireplace. When we built our house we debated about adding a fireplace… I really like the look and ambiance that a fireplace gives a space, but I certainly didn’t want to have that as a primary or secondary source of heat. Plus, I really didn’t want to have the mess of chopping down wood and packing it through the house… Me no likey the mess. Trust me. I grew up in a house with a fireplace. That darn bark and dirt gets everywhere…. It ah, drives me crazy. And who wants to pay for something they’re not going to use?

(We don’t have natural gas either… just propane. And we weren’t having ANYTHING in the house fueled by propane except the gas cooktop… propane can be crazy pricey… We went with Geo-Thermal and LOVE it.)

But what I do like about fireplaces, is the mantle! You’re totally shocked that I just said that, right? Like, you weren’t expecting that as my reasoning… (Sense my sarcasm). Ok, glad we’re on the same page now. Moving on…

Mantles are pretty and they give so much freedom for decorating. They’re like clothes, you could change it daily. And without a whole lot of work to boot.

These shelves are like my mantle.  (Insert warm fuzzies HERE).

I majorly love these shelves…

Since they made an appearance in fall, of course I had to deck them out for the season. But, seriously, how awesome will these be to decorate with every changing season or on a whim or for anything! Really. So awesome!

Honestly, they were so easy to make. I’m a really bad blogger though, and I didn’t take pictures for a tutorial… just call me lame. Get it over with. I’ll wait. Seriously, go ahead. I was just thrilled to have my hubby’s attention and focus. I didn’t want him to get all sidetracked by me taking pictures and writing down step by step directions while he was helping me build them…

But, basically we just started building them. We sorta did it like this though. (Be sure to check out their AWESOME shelves too. Lovely.)

I love how ours turned out. I walk by to stare at them. I stand in the kitchen to stare at them. I sit on the couch to stare at them.  It’s a tough job, but someone’s got to do it.

Christmas is just around the corner and I’m already working on several ideas. I’m pretty easy to make happy. Just give me some shelves and I’m all set.

Big Smiles!

I’m linking up to:

DIY Show Off

A Bowl Full of Lemons

Home Stories A to Z

Striped O

I like stripes. But I’m pretty sure that you already know that…

With the entryway having stripes, I figured the mudroom should too.

No, I didn’t paint the walls with stripes. That would be way to difficult with all of the doors and angles. Trust me. I already thought about it.

A while back I was going through a few drawers and happened to find a wooden initial for our last name. An O to be exact. At first, my plan was to wrap it in yarn. I actually started wrapping it but I quickly got bored and frustrated with it and decided to skip the whole yarn wrapped letter thing.

Then I thought about covering it in burlap… but that’s just too much burlap (is that even possible?) in one area. Scratch that idea.

Next up was paint. Easy enough. So I dug out my trusty Heather Gray paint and gave it a couple of coats.

Better. But it was still missing something. Just call it plain. Randomly, stripes entered into my brain. So, without much thought, I went with it.

Rather than having evenly spaced stripes, I thought it would be cooler to do various widths.

Honestly, I just eye balled this whole thing. Would it be bad to say that I didn’t even think about getting the tape measure? I did grab the level though…

With it all taped off, I gave it 3 coats of leftover white paint.

With the paint still wet, I quickly pulled off the tape. And prayed paint hadn’t bled through my tape…

We’re good. No bleeding! Score!

Then, I just put it on the top of our mudroom ledge.

I can’t guarantee that it’s going to live in that exact spot, but I’m happy to start adding accessories to our mudroom. I still have several more projects up my sleeve!

Big Smiles!

Mudroom Burlap Frame

Hello Happy Friends!

Well, I finished another mudroom project. My checklist is dwindling and it feels awesome! Better yet, this little mudroom of ours is getting lots of much needed personality.

If you’ll remember, my last mudroom update was all about the FREE bench that I scored.

This project is no different in cost. We’ve had the frame for awhile and because I didn’t know what I wanted to put inside, it set with the stock photo’s. It totally lacked personality… one might have even given me a hard time for hanging it up with complete strangers staring at us every time we walked in the door to OUR own house… It was just one of those times where I was unsure what I wanted to do with it. So, naturally, I did nothing.

Enter in the lovely burlap, and inspiration finally struck me! Rather than pictures of us, why not letters?

And because I consider myself creatively cheap, I made letters out of cardboard I had on hand, rather than buying any needed supplies. So, you might have guess it, this project is also FREE!

Excuse me while I do my happy dance…………….dancing……………. twirling…………..dancing……………….. slipping…………….. falling…………….

Ok, I’m back.

The only thing that’s better than free, is how great it looks!

Seriously. Check it:

Awesome, right?

Easy peasy too!

All I did was trace my printed letters onto cardboard.

(Sorry for the picture quality, I was doing this project at night….)

After I traced my letters, I cut them out with a razor blade.

Cut my burlap to fit inside the 5 x 7 mat.

Painted my letters with leftover paint from my stripes and hot glued the letters to the burlap! So easy!

Honestly, I love how the burlap compliments the rug. They work perfectly together.

Here’s the before & after:

Ah, much better!

And, happily, we get to check another thing off the list.

1. Add storage bench below coat rack/ frame.

2. Upholster bench cushion or recover existing with fun fabric.

3. Add wire baskets for hats & things.

4. Add art/ pictures to coat rack frame.

5. Accessories, Accessories, Accessories!

6. Paint mudroom/ garage door.

7. Install non slip backing under current rug.

Yes, we’re quickly narrowing down the list. Awwww yaa!

Big Smiles!