Favorite Projects of 2012

As we get ready to head into 2013, I thought I would take today to highlight my favorite projects from 2012.

We’ve had a very busy year, especially once our house was finished and we could start moving in.

In no particular order, below is a recap of my very favorite projects from 2012.

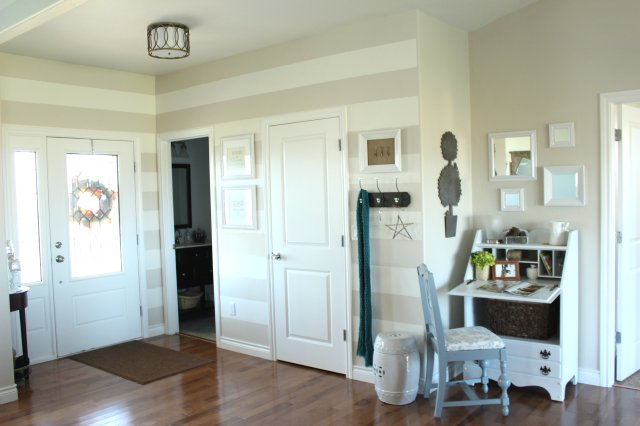
We love our painted stripes. They totally transformed our entryway!

Entry Stripes

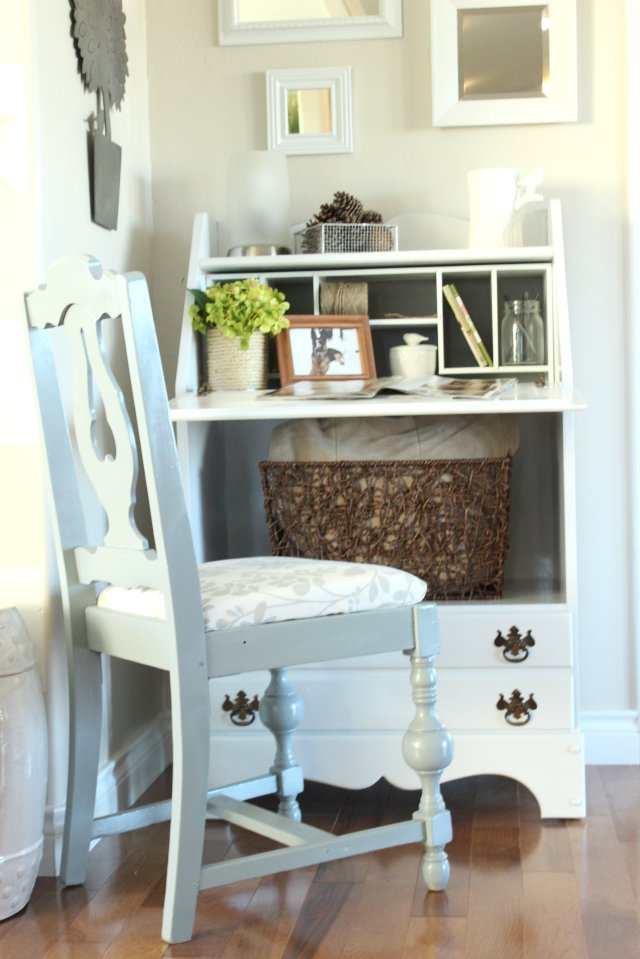
Our painted secretary– such a great transformation!

Painted Secretary

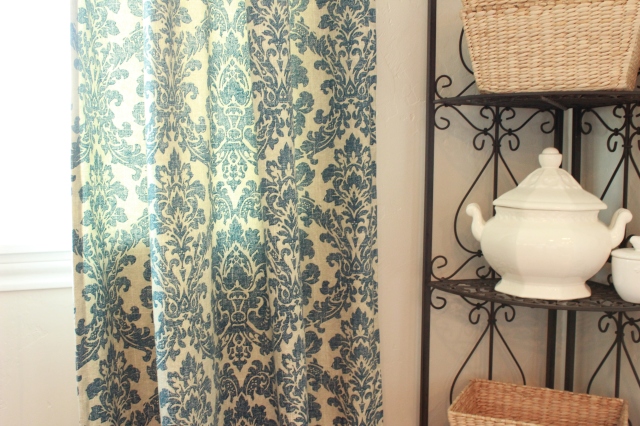
I also did my first big sewing project with our Breakfast Nook Curtains.  Although, they’re about to make an appearance in a different room.

curtains 4

And I loved the outcome of my painted sewing machine table.

Paintec Sewing Machine Table

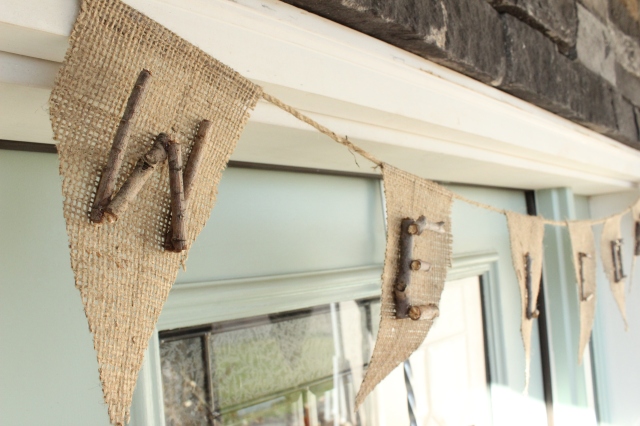
One of my favorite free projects was easily the burlap and stick welcome banner. It’s still hanging up! 🙂

Burlap & Stick Welcome Banner

Possibly the most exciting “big” project we accomplished this year was the breakfast nook bench. It’s amazing how much it has changed the space and I absolutely can’t wait to finish the room in 2013!

Breakfast Nook Bench

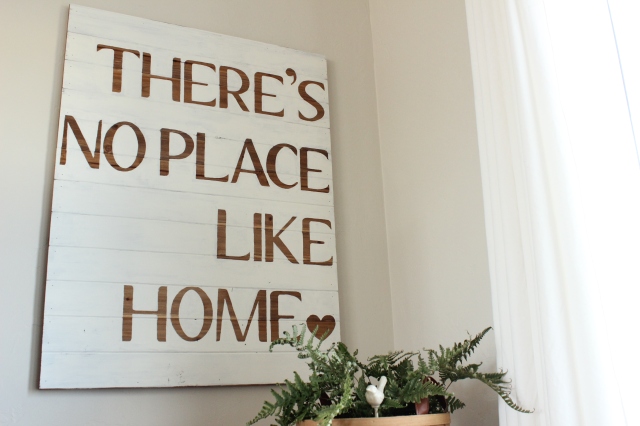
The living room sign was also an awesome project.

There's No Place Like Home

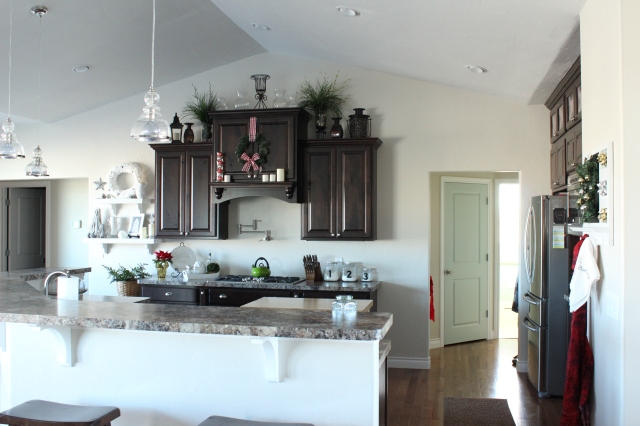
You all know how excited I was for our kitchen shelves!

Kitchen Shelves

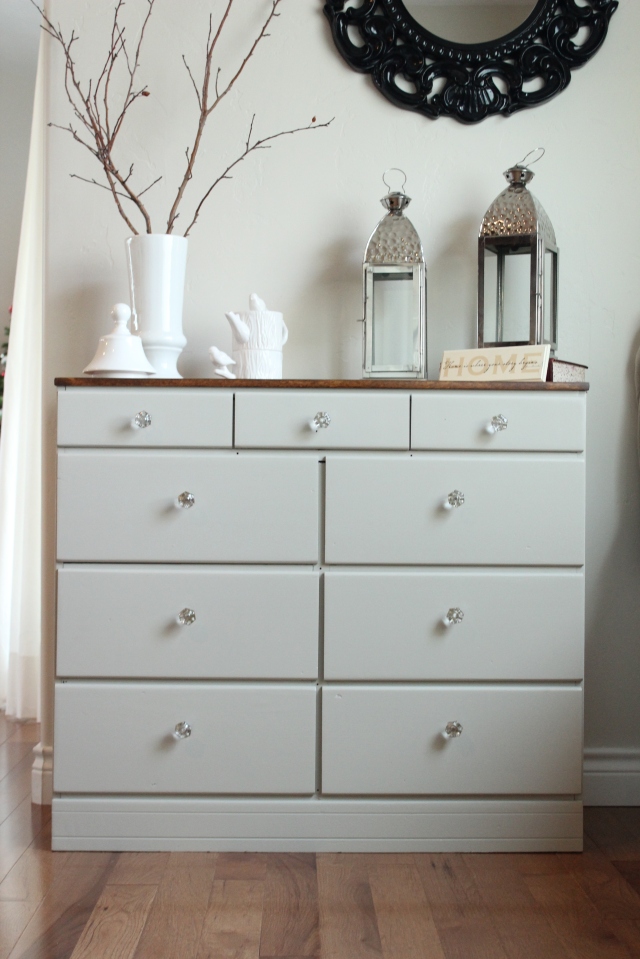
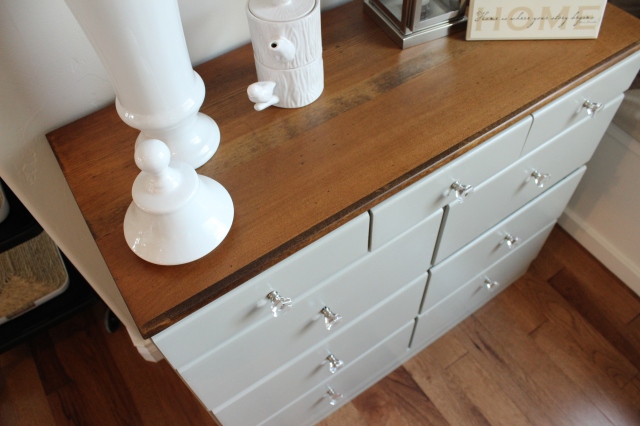
Our breakfast nook also received another update when I transformed the current dresser into a two toned beauty. See how I did it here.

Two Toned Dresser

And finally, I loved showing you our Christmas house tour, which has links to all my favorite Christmas projects from 2012.

Christmas House Tour

Well, there you have it, all of my favorites from 2012. I can’t wait to see what 2013 will bring. We already have a whole list of projects waiting to be completed throughout the year. I’ll show you the list soon.

To all my readers, old and new, I can’t even begin to express how grateful I am to have you as followers. Your comments mean more than you will ever know!

Don’t forget- starting January 1st, my new site will go live and The Wood Grain Cottage will come to life! I’ll see you there!

blue & green signature

Linking up to:

Southern Hospitality

A Bowl Full Of Lemons

The 36th Avenue


Breakfast Nook Dresser: Two Toned Transformation- How To

Last week I showed you our newly transformed dresser. And because I am so happy with the way that it turned out, today I’m showing you what I did.

First off, I headed to Walmart to buy some paint stripper. I followed the directions on the container and ended up doing it 2 times to remove most of the paint. Very easy, but just make sure you apply a nice thick & even coat!

After I scrapped off all the paint, I got busy sanding! With our large sander, going with the grain, I sanded down the entire top until the black paint & gray primer was completely removed. Be patient.

Because I was staining the top, I sanded down the front and sides as well. I also made sure the surface was super smooth.

After the sanding was finished, I wiped down the top & sides with a microfiber towel, followed by a cheesecloth. Leave no dust behind!

Next, I picked out my stain. I originally planned on using Minwax Early American, but I tested a small spot on the side of the dresser and it was REALLY dark!

(I freaked, which I shouldn’t have, because I could have just sanded it off….)

After that I played around with several different colors, some together & some not, and ended up with Provincial by Minwax.

I found that the sides of this wood (pine) stained darker than the top. I barely wiped the stain on the sides before I wiped it off again and it was DARK. It threw me for a loop. So, I tried about 4 colors on the side, but I didn’t like any of them. They were too light. The dark color looked the best, so I decided to do it on the top.

Thinking it would do the same as the sides, I wiped it on and off again quickly. It hardly touched it. So the next time I let it sit a tad longer…. still not as dark as I was going for.

I could see that I wasn’t going to get the color I wanted with the Early American stain, so I grabbed the darkest stain in our cupboard, Provincial by Minwax. Boy did this scare me… it was dark…

I spread the entire top with the stain, wiped it off, and it gave me a slightly darker color… rather than doing the same, wipe on, wipe off for the next hour, I decided it was time to just go for it. I put a thick coat of stain on the top and waited.

After about 10 minutes I wiped off the stain and could tell it was getting darker. I did it again and waited another 10 minutes. This time I wiped it off and it was perfect! Finally!

I called it a night and waited until the next day to spray on a sanding sealer. Once that was dry, I LIGHTLY sanded the top with 220 grit sandpaper, going with the grain, and wiped it down with cheesecloth. Then, I sprayed on two coats of a satin poly. I didn’t want a super thick or shiny coat, so satin was the way to go.

Once the top was dry, I taped off the edges with Scotch Blue Delicate Tape and started painting. For the color, I chose Martha Stewart’s Mourning Dove. I had it mixed in a water based enamel with a semi gloss sheen. Not too shiny, not too dull. Just right. 😉

When it was dry, I reinstalled my knobs and waited a day or so before moving it back inside the house.

3

Honestly, nothing about this project was hard. A little time consuming, yes. But not hard.

It was totally worth the work and we love the outcome! Plus, it has totally changed my feelings towards our current table. Without planning it, the stain on the dresser matches the table. For now, the table stays.

Here’s my advice to you: if you have a piece of furniture that you really want to transform but are frozen with fear, quit it! Trust your instincts! Don’t let fear stop you. And certainly don’t be afraid of paint or stain. They don’t bite!

Now get out there and transform- you won’t be sorry!

Big Smiles!

Linking up to:

Thrifty Decor Chick

Breakfast Nook Update: Refinished Dresser

Hello and Happy Friday!

I’m back with yet another breakfast nook update. Now that we have added the bench, it’s prodded me to finish several other projects that I’ve been wanting to accomplish.

When I originally told you about the breakfast nook changes, I showed you my to do list:

1. Make a bench out of existing cabinets the full length of the window. Hopefully I can find the cabinets at Habitat for Humanity to save on cost. Fingers crossed!

2. DIY a bench cushion.

3. Hem curtains to allow for bench.

4. Get new pedestal table. I’ve been searching Craigslist and think I might have found one on the cheap. Just a little paint and elbow grease and we’ll have a show stopper.

5. Find new chairs for the table.

6. Find & install a new light fixture.

7. Make new DIY artwork.

8. Find new rug.

9. Accessories, Accessories, Accessories!

However, what I didn’t include on the list was refinishing the dresser.

Much like the table, it’s an important piece to the room. And one thing I never liked about the dresser was that it clashed with our current table and chairs.

Now, for a little history on the dresser. This was the first piece of furniture that I bought on the cheap with the intention of refinishing. Spray paint had also rocked my world around the same time, so, naturally we spray painted the entire thing black and changed out the knobs. Needless to say, this was a HUGE improvement to its previous condition. I really liked the look of the black.

Then, we moved in to our house and it’s new found home was in the breakfast nook posing as a sideboard rather than a dresser.

For six months I have looked at the breakfast nook knowing that there were several things “missing” or “out of place” and for six months I had been looking for the solution. Little did I know at the time, but the black dresser was prohibiting my true inspiration and ideas for the space. Sounds deep, I know.

After we installed the bench, I knew my next step was to transform the dresser. I kept imagining a totally different look and vibe. Something softer, more natural, with furniture that didn’t instantly “grab” or “take over” the room. The dresser kept doing that.

Now, for the record, I have nothing against black furniture. Obviously I think it’s striking, or I wouldn’t have painted it that way in the first place. Problem was, I kept trying to make it “fit” and it wouldn’t. It needed painted. And I was finally ok with doing it.

Inspiration hit not long after, and I had my solution.

This dresser underwent my first “serious” renovation. It didn’t include spray paint, and it didn’t include one solid color. Two toned was the way to go!

I wish I could show you the full room so that you could see the impact it’s had on the space, but you’ll have to wait!

Here it is all by it’s lonesome!

I am completely smitten with it’s two toned finish and the way the stain compliments the paint. It’s pure loveliness with a touch of rustic!

I’m totally impressed with how much better my accessories look! They’re no longer competing for your attention…

I left all of the original nicks and nail holes. They give it the slight rustic look that I was wanting. It’s not perfect and it looks like it has it’s own story.

This was such a rewarding project and one that taught me so much. I found that staining wood isn’t something to be afraid of. It won’t bite and it’s fixable- just grab your sander!

The more that I work with furniture, the more that I like it. Seeing these transformations is enough to keep me going!

Stay tuned for the step by step guide on how I transformed this dresser.

Big Smiles!

I’m linking up to:

Miss Mustard Seed

A Bowl Full Of Lemons

House of Hepworths

The 36th Avenue

Alderberry Hill

DIY Show Off

Breakfast Nook Update: The Bench

Helloooo! As you may have noticed, I took a few days off for Thanksgiving. 🙂

Since this is the first year in our new house, we hosted Thanksgiving. It was lovely. Needless to say, I was busy, busy, busy! From cooking, to cleaning, to crafting, I was doing it all!

A big part of the “rush” would be because we just finished building our breakfast nook bench! Eeekkk!

It’s turning out wonderful and I can’t wait to show you the end and “final” result.

However, this post if all about building the bench.

Here’s how it went down:

First off, we cleared out the room and pulled up the existing baseboard.

Next, we measured, and double measured, the length of the wall and my Mr. built the bottom frame of the bench.

(P.S.- I totally apologize for all my “orange” pictures… we were mostly doing this project at night and I’m still trying to figure out all the settings on my new camera. Of course, I figured out how to take better pictures at night AFTER this project was over… SORRY!)

As you’ll notice in the above picture, we had to notch around our existing vent. The best way to do this was to build around it.

Once the base of the frame was down, he started adding the sides.

After the sides were up, we added the front and back supports.

Just like the vent, we had to notch around the two electrical outlets…

With the frame finished, my hubby started cutting the MDF for each “box”.

After the front was covered, he started cutting the MDF for the top of the bench. The top of the bench, or lid, sits on top of the frame.

This picture doesn’t show it, but we framed a box around the vent hole and used a narrow roll of insulating foam to go around the bottom of the frame. After that, it was completely air tight and we attached the new vent cover to the front of the bench. Easy peasy!

Once the entire thing was covered with MDF and the lids were cut, we started drilling the holes for the lids.

With the holes drilled, the hubby started trimming out the front.

After caulking, it was finally time to paint!

I know that in my original post I talked about making the bench out of pre-made cabinets. After doing a whole lot of research, I found that it really wasn’t that great of a deal. We needed three cabinets which would have made the cost around $230. And that was just for the cabinets. As well as the price, I really didn’t like the idea of using cabinets. The storage capacity didn’t seem that great and I wasn’t digging the idea of the doors opening into the furniture. I felt like I would have to move the furniture to get the cabinets open, which would make it hard to actually use the bench as storage.

With that in mind, we designed this bench to be a power house for storage. Since the lids open from the top, I can just lift them up and stick things inside. Perfect!

We spent around $90 on the bench, which is WAY better than the $230 that the cabinets would have cost. Plus, I LOVE ours! I can’t even remember the breakfast nook without it. That makes it pretty awesome!

Next up is the cushion. This room is coming together just like I imagined… maybe even better!

Big Smiles!

Linking up to:

A Bowl Full of Lemons

Home Stories A to Z

House of Hepworths

The 36th Avenue

Breakfast Nook Plans

Lately I’ve been daydreaming of my most recent obsession: Sunny breakfast nooks with bench seating. Yes, you read that right. I’ve been obsessing over breakfast nooks. And bench seating.

It’s what I do… my mind is constantly changing, organizing or decorating something. You’d think that I would get tired of it. Actually, it’s the exact opposite. I thrive off of it! Honestly, the more that I let my mind wander, the better my ideas get.

Does that happen to anyone else?

Anyways…

Since we have a dining room and a breakfast nook, I’ve recently decided that I want to make our breakfast nook, well, breakfasty. I want to add a comfy bench with usable storage and numerous pillows, a  pedestal table with new chairs and a round sisal rug.

I can’t even begin to describe my excitement. The best part? My Mr. totally agrees with me! My smiles are endless.

Since I have this enormous amount of excitement, I couldn’t wait to share our plans and inspiration.

This is our current breakfast nook:

And here’s what we’re planning on doing:

-Make a bench out of existing cabinets the full length of the window. Hopefully I can find the cabinets at Habitat for Humanity to save on cost. Fingers crossed!

-DIY a bench cushion.

-Hem curtains to allow for bench.

-Get new pedestal table. I’ve been searching Craigslist and think I might have found one on the cheap. Just a little paint and elbow grease and we’ll have a show stopper.

-Find new chairs for the table.

-Find & install a new light fixture.

-Make new DIY artwork.

-Find new rug.

-Accessories, Accessories, Accessories!

I would love to be able to set a budget, but not knowing if I can get cabinets at the second hand store will be a total game changer.

This is ideally what I envision for our breakfast nook:

Source

Are you in love as much of me? This is my favorite…. and what I completely want to copy and paste into our space. It looks so inviting. I want to sit in the sun, sip on hot tea and nibble on a scone. Mmmm…

The bench is amazing. And the textures… wow!

Source

So crisp and clean, it makes me feel happy!

Source

This bench is nearly perfect…

Pottery Barn, but couldn’t find the direct source… SORRY!

Every one of these rooms has completely inspired me… They all make me want to curl up and soak in the sun.

I am beyond excited to get this project under way! I’ll be sure to keep you updated along the way!

Big Smiles!

Breakfast Nook Curtains

Here I am, finally revealing my breakfast nook curtains. Which I made, by the way. Sewing and all. I’m so proud of myself.

This was a huge triumph for me! I mean, I had to do quite a lot of sewing with an end result that would be visible to anyone in my home. No pressure…

It was actually a lot simpler than I thought it would be and something that I’m really glad that I did. I’m practically bursting at the seams to work on more sewing projects.

Plus, the outcome of the curtains is enough to make me want to continue. They’re lovely and just what I had been imagining for the space.

Happy dance! I just love how they turned out.

This space is coming together! Big smiles!

Mirror Mirror

I’ve made a change to our breakfast nook. I was searching the clearance section of our Hobby Lobby and came across a black mirror for a great price. When I first saw it I wasn’t sure where I would hang it, but it was too good of a deal to pass up at $15.00. So I proudly carried it throughout the store (it was too big for the cart) and drove that baby straight home. On my drive home a light bulb went off! This mirror was going in the breakfast nook.

Here it was before:

And here it is now:

I’m loving the contrast of the black and white and how the mirror enhances the dresser.

On a side note, I’ve realized that photographing the breakfast nook in the morning is a mistake…. the lighting isn’t right. Live and learn, eh? I’ll have to update these pictures later.

Have a great one!

P.S. This room is about to change again. I may or may not be making my first set of drapes. 🙂

Breakfast Nook Progress

My hubby and I went round and round when we were building our home. He thought that we only needed one “eating area”. Be that a dining room or a breakfast nook, he only wanted one. Why? Because he knew that we would probably eat at the kitchen bar every night and not sit in either room. 😉

He might be right.

But that didn’t stop me from still wanting a dining room and a breakfast nook. Yes, my friends, we have both. And while we don’t use them everyday, they most definitely serve a purpose. You see, I have plans for these rooms. I like to entertain and host family gatherings and this house is set up perfectly for it! And truth be told, that excites me.

While my handsome husband still doesn’t see the purpose of having the two rooms, I certainly do. Plus, it’s more areas to decorate. 🙂

I showed you our dining room a few days ago, and here’s our breakfast nook!

It makes me oh so happy and I smile every time I walk by!

So very happy. It’ll brighten any mood! And I’m completely in love with my tree and birdie teapot and cup. It’s adorable. And it has a matching measuring cup set, which I’ll show you soon.

The vase. It’s stunning. A completely lucky find at our local thrift store. And it was $4.00. What? Lucky.

The black dresser was my first paint makeover project. It was a sad little piece that desperately wanted loved. I painted it black and added the glass knobs. Now, it’s a show stopper. And perfect with crisp white accessories and the wood tones from our table.

More plans are brewing for this room, but for now I am loving it!

What do you think? The bright pops of yellow and white have me under their spell. 🙂